Wild West Grunge
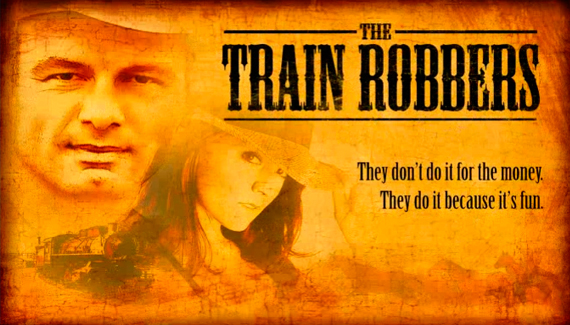
Corey shows you how to recreate this rugged, weathered look using a couple of filters, blending modes, and layer masks.

Corey shows you how to recreate this rugged, weathered look using a couple of filters, blending modes, and layer masks.

I agree with David, I want to know how to create that background effect aswell. or a burnt paper effect.
Good tutorial though. 😀
That rocks! Thanks!
I would like to have Corey Barker’s email. Please give his email to me. I want to buy the book from him. Thanks
Gr8 Corey!
(How is the background done?)
Thx,
As with all the talented persons at NAPP and Kelby Training, I am continually amazed at the skill and knowledge. Corey you make your tutorials so easy to follow and at the same time, you make me look good. Thanks and please keep up the great work.
Yes, please tell us how that background was made.
Wouldn’t you do the background the same way as corey did the girl with color burn under the blending mode to a new document and then add your pictures and text?
This one really rocked Corey. Thank you!
Wow…How do you create that background Image? can anyone show me how? I need it because I want to put my picture up for a cool cowboy pix. Thanks
You rock Corey!
Respect to tha masta!
I´m with the dudes here and I too wonder how the background was created.
Thanks.
i cant get the Luminosity to work help please
I really like this and I can’t wait to try it but I need to find the right pictures…hmmm….
Where can i download that background?
mike you can also click on a layer with the luminosity by ctrl-clicking (command clicking on mac) the RGB channel in the channels pallete.
anyone find out where to download/create the background?
Hi. where is the tutorial about this topic?
Just wanna say great tutorial Corey as per usual.
thank’s robert, please send me backgroud gallery..
I would really like to know where to get the background, please
Nice work man!
Where can I get the orange background, and is tutorial in a Action?
Once again an excellent tutorial! i loved the outcome of my picture.
though I must admit it came out a lot different than yours, mainly because i used a different source pic for my BG…if you could elaborate in a future tut on how to create the kind of BG you used, I, along with some others apparently would be very appreciative!
thanks again! keep em coming!!
regards
Josh
wow…..i like it….
I just learned about this site and i love it. I was also wondering how the background was made for this tutotial.
im so mad, once again, an amzing tutorial, but no way on how to make the backround
great tutorial, if you want background just by paper texture on istockphoto.com
Hi Corey
I really enjoyed following this tutorial so much I went and got the Disney Wild West Show hat from the top of my wardrobe to create this image. I also added bullet holes from your tutorial on making bullet holes. It looks really effective I think.
http://www.flickr.com/photos/dereksbeard/3304872012/
This is great. One of the most helpful tutorials I’ve seen. The only problem I’m having is I can’t figure out how to add multiple gradients to my layer masks. When I click and drag the gradient for another side, it just replaces the previous one. Any help?
I would like to see the inscription to be continied