Sponsored by the National Association of Photoshop Professionals. Learn More
In this video tutorial, Dave Cross shares some quick tips for using “guides” in Photoshop.
Dave Cross is Senior Developer, Education and Curriculum for the National Association of Photoshop Professionals and is involved in all aspects of the training that is provided to NAPP members. Dave’s book “The Photoshop CS2 Help Desk” is now available on ScottKelbyBooks.com
RSS feed for comments on this post. TrackBack URI
Recreate the text effect from the title to the new blockbuster movie.
Continue exploring the possibilities with Photoshop’s new 3D tools.
Corey shows you how to make a new photo look damaged by blending in some unusual textures.
Use Photoshop’s new 3D tools to create some dazzling background effects.
When I’m done working with an image, I like to sit and admire it (hey, I spent six hours working on it, I should). To do that, I hit the Tab key, then hit the F key three times. This hides all of the panels and toolbars and lets you see the image by itself surrounded by black. To get back to regular mode, press the F key and the Tab key one more time.
Rajneesh said on — June 23, 2008 @ 2:58 am
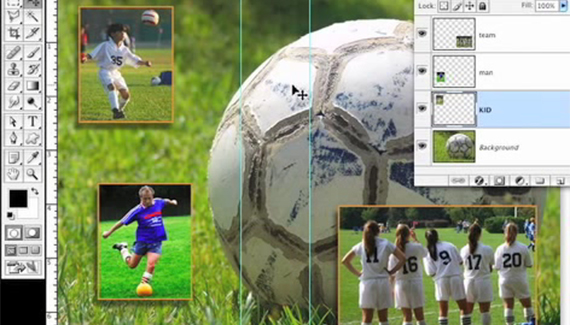
this tutorial is really the best, can you please tell me is there any way to cut up the pieces of any image by putting guides in it, let me explain, if I want to cut a big image into small pieces say 50 making guides, is there any way or option in photoshop to automatically save ‘em insted of cutting ‘em manually and pasting into new small images.
regards,
rajneesh