
You know me – I love styles. Unfortunately I talk about them so much these days that it may seem I rely on them for nearly everything, but that isn’t the case at all. Believe it or not, I do delve into channels for some effects, and to be truthful Channels still offer greater control when trying to pull that extra something out of a reflection or a bevel.
Let’s take a look at using channels to help with an effect. Here we go!
To begin with, create a new image and enter some type or drop a shape on it’s own layer.

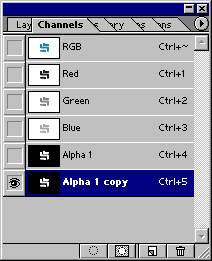
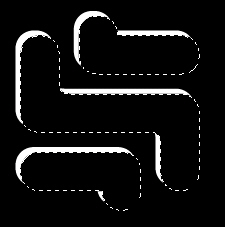
Command/CTRL+Click the layer to create a selection. Go to the Channels Palette and create a new Alpha Channel. Fill the selection with White, then duplicate the Alpha Channel.
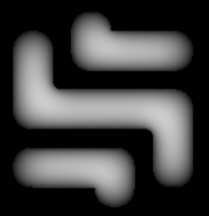
If you were to apply Lighting Effects using one of these Alpha Channels, you would get a smidge of depth and lighting, but it doesn’t really make the type/shape stand out from the page.
I’m going to show you a couple trick that people use for beveling with channels.
In the Channels Palette, select the Alpha 1 Copy channel. Make sure your selection is active. We are going to start blurring the contents of our selection in varying degrees.
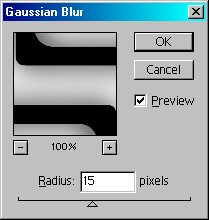
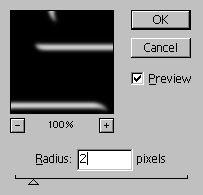
Go to Filter>Blur>Gaussian Blur. Start with a setting of 15 (maybe less depending on the size of your selection). The point is to blur the edges of the selection while gradually getting lighter toward the center.
Repeat the blur 3 more times, with gradually decreasing blur settings: 9, 4, and 2.
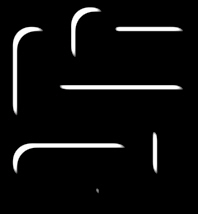
Deselect the type/shape, and Gausian Blur once more with a setting of .5.
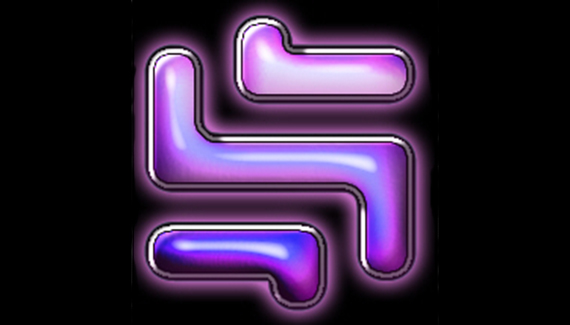
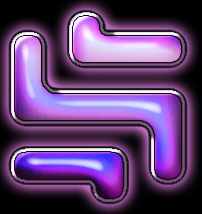
Now when you apply Lighting Effects to your layer, you actually get some depth:
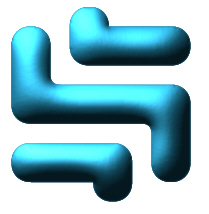
Let’s re-apply lighting effects to the same layer, only this time from a different angle with alternate colors:
Now lets work on some reflections. Go back to your alpha 1 channel and again make your shape selection active. Create a new channel and move your selection to the right 10 and down 10. Fill it with white. Again, move the selection down and to the right, this time by 5 each. Fill the selection with black.
Go to Filter>Gaussian Blur, and apply a setting of 2.
Bring up your Levels (Command>CTRL+L) and move the sliders together until you get a nice, well defined but rounded effect:
Command+CTRL+Click the Channel to bring up the selection for the highlights. Go back to the Layers Palette, create a new layer, and feather your selection by 1. You may need to reposition the selection to better match the shape position. Fill the Selection with White, set the layer mode to Overlay, and duplicate the layer.

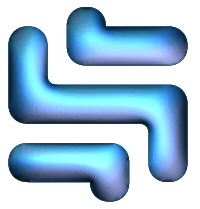
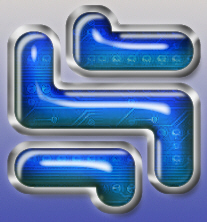
This gives a pretty solid foundation to build on. Now when we play with the layer styles, we get an effect that is much richer than if we had used styles solo.
Catch you next time!

Luv it! Thank you for this tutorial as I’m always looking for new ways to do things in Photoshop. Great work.