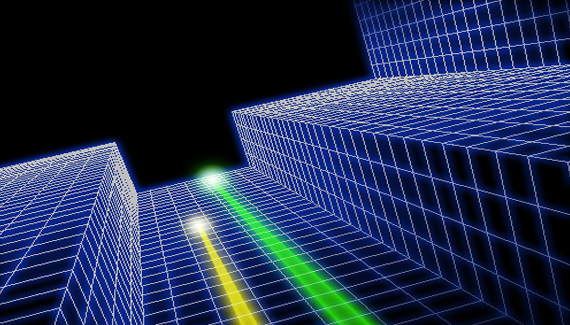
Inspired by the new Tron clip released this week. Corey uses Vanishing Point to create a retro Tron effect based on the original 1980’s version.
{module:author-cbarker}

Inspired by the new Tron clip released this week. Corey uses Vanishing Point to create a retro Tron effect based on the original 1980’s version.
{module:author-cbarker}

OMG!! Nice !!
I never heard of Tron until I went to allbetsareoff.com and that was a blog post. The movie looks awesome and I’ll have to watch the original. Great tutorial! 🙂
It stops at half the video!! :OO
For some reason i cannot select the vanishing point feature, no matter which layer or tool i have selected. Any help? Im running a mac & CS3. Thanks!
Hi,
Your tutorials are very nice and easy.
Basically I am Web Developer (LAMP, WAMP…), Now I am learning Photoshop and Flash. I found your style of explaining and examples. 🙂
Thanks for these videos.
Hi,
Your tutorials are very nice and easy.
Basically I am Web Developer (LAMP, WAMP…), Now I am learning Photoshop and Flash. I found your style of explaining and examples very easy. 🙂
Thanks for these videos
does this work in CS2?
cant get it to render the grid pattern. need help:(
I have never used the vanishing point on this way, Nice! So simple to make and such a nice result!
WOW thanks for this…
im 16 your vids are teaching me new skills when i put all the skills together i can make great photoshop art
just awesome!
Ok, I REALLY wish I had you as a teacher in college (especially when the teacher we had to teach us Flash had never touched the program in her life.) I watch a few of your tutorials and I feel like I’m walking away with so much more than I got in 3 years of my graphic design course.
i would say i love you… but i am not like that…. 😀 your my idol
Thanks a LOT for this, I really like your tutorials, I’m gonna start watching every one of them, thanks for helping everyone out!
Greetings from México!
How cool! Thanks, Cory.
Dude, insane. I’ve never used the vanishing point at all. I’ve heard about it but, I don’t know, just wasn’t into it I guess. After seeing this I am defiantly going to use it more often and play around with it. Thanks!
love the tutorial, another amazingly helpful tut as usual. can anybody tell me how you can change the background of the photoshop programe, as in behind the window youre working in? i.e – the blue “smokey” image at the start of this video.
This … is … so … awesome!!!
It’s unbelivable, that you can do such cool things with just a few clicks in vanishing point!
This tutorial really got me a “WOW”-Effect 😉
@Chris Owen:
You are actually just seeing the desktop image on a mac. This is how photoshop (or any program) is displayed on a mac, the desktop is equivalent to the “window” on Windows, and all of the components float. You’ll notice that the top taskbar changes to whatever program is in use.
Damn Corey how do you do it! Every single time I watch a tut of yours I learn something completely new….which no other site or person has shown b4 on the same subject/filter/area!! You totally rock!!!!!
When is the next one out i thought it was on a friday. its 9pm sat night here in the UK and i NEED my next corey barker fix lol
Why cant I see the tutorial video..??
Nice &simple.thank you ,waiting more from you
Hmm.. It is too bad this tutorial video is not transcribed or in text format! It looks like fun to learn!
DUDE!!!!! Your tutorials have taught me so much!!!! I’m in a graphics class so i’m learning things i’m not generally taught in class. (Miss B, if you see this, no offense XD)
very good tutorial, thanks you Corey
thanks tutorial
For Seth – had same issue of vanishing point being grayed out until I noticed that Coreys file was in RGB/8 and I had something else set up. When I changed my settings to RGB 8, vanishing point was available to use.
Awesome. Needed this type of effect for a graphic I’m working on. Thanks so much!
OMG! TRON was one of my favourite movie when I was a child. THX for this tutorial!
Top class, much thanks.
hey im trying to find a way to render vanishing point on cs2.but so far that’s just there for lulz and giggles .cs2 doesn’t contain that little menu on the top left hand corner of the vanishing point menu(the one on the 2:58 mark of the video)
please help
i request that u put what size you have your photoshop file at before each video plz.
thank you very much, you gave me many ideas and inspiration, right now he needed a way to TRON.