
Rescuing Underexposed Images with Camera RAW
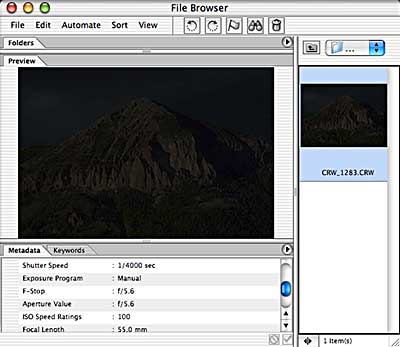
There are many, many reasons to love Photoshop CS’s Camera RAW plug-in. In this particular example, an image was inadvertently captured when the camera’s shutter released unexpectedly. Yet, with the help of Camera RAW, a perfectly acceptable image results. As you can see in the File Browser’s preview, this image is in pretty bad shape. (When pressing the shutter release halfway to check the camera settings, the button went just a little too far, capturing with inappropriate settings.)
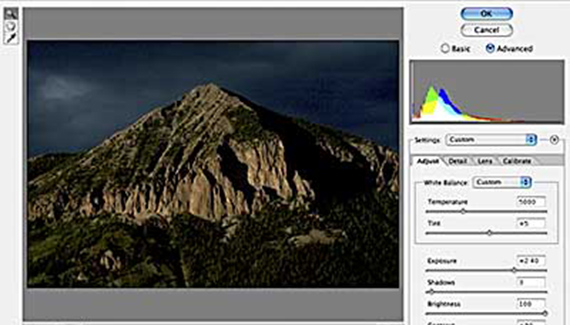
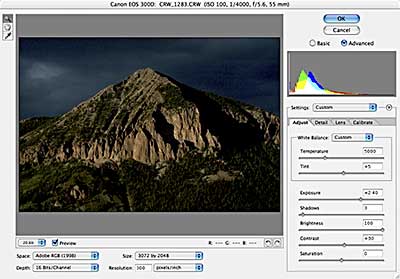
Opening in Camera RAW and adjusting a few sliders, we have the possibility of salvaging the image. In this example, the primary adjustments are:
- Exposure: +2.40
- Shadows: 3
- Brightness: 100
- Contrast: +30
Camera RAW’s Detail tab also offers sliders for Luminosity Smoothing (which reduces the light and dark noise in an image) and Color Noise Reduction (which reduces the red, green, and blue pixels often visible in shadows).
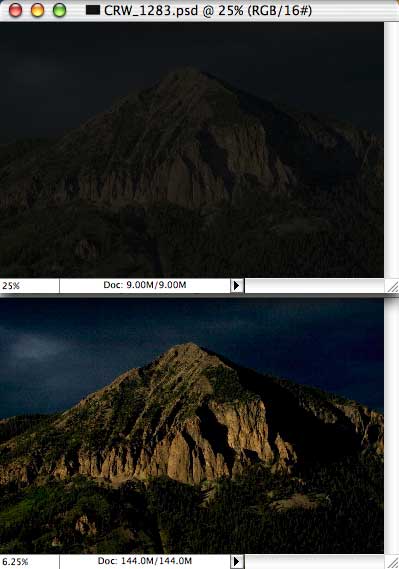
A little more work in Photoshop itself to reduce noise in the shadows and sky, and a dramatic image results. Compare the image as captured (top) with the rescued version (below).
And to think that, right after shooting the image, a look at the camera’s LCD almost resulted in a quick deletion of the shot…

This was pretty useful, thanks!
Lájk