
Recovering Lost Highlight Detail
Tips and tricks are the trading cards of Photoshop. Scott Kelby makes a good chunk of his living teaching and writing about them. Photoshop techniques, tips and tricks are like hamsters… they beget rapidly with each new user adopting a variation.
Currently, the hot technique is Luminosity Masking. My buddy Jim DiVitale calls it “the claw” for its five keys plus elbow keyboard command. My variation has been assigned an F4 action. Now everyone is on the Luminosity Bandwagon. It’s been one of my favorite imaging tools since I learned about it at Photoshop World 2000. Here goes:
Most digital cameras have incredible exposure metering capabilities, with many boasting multiple area matrix metering. However, with extreme contrast scenes, the highlights are the first to go. If you adjust in Photoshop to recover highlight detail, shadow areas and midtones are often affected adversely.
Attempting to select highlights by selecting with the Magic Wand or using the Similar command do work, to a certain extent. But the results are often artificial looking. Luminosity Masking to the rescue!
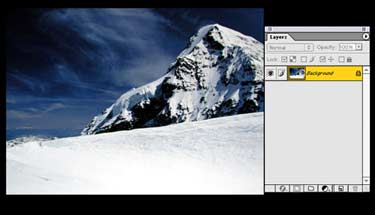
I’m using an image I made of Switzerland’s Jungfrau a couple of years ago. As is typical, matrix metering resulted in a good overall exposure with a deep blue sky and washed out detail in the highlight area, namely the snowy ledge beneath the mountain.
The secret behind this tip is to select the luminosity of the image, which will vary from picture to picture. This is done by using the keyboard command Command+Option+~ (tilde) [PC: Control+Alt+~). This results in a selection of the highlights based upon that image’s luminosity. Since luminosity varies throughout an image, the selection is effectively self-feathered.
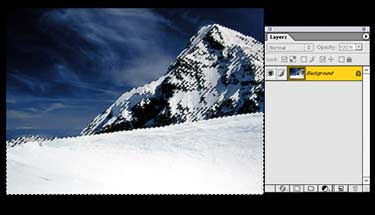
The screen shot shows the luminosity selection which is basically composed of the snowy areas on the mountain and the bank beneath the mountain. In addition, highlight luminosity is present in the clouds. In my judgement, I wanted the mountain and clouds to remain unchanged and just increase the detail in the snowy bank.
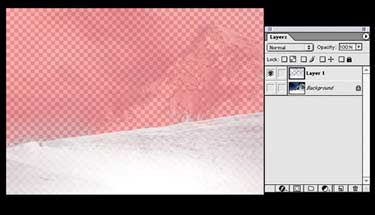
So I sent switched the luminosity selection to Quick Mask and used the airbrush set to black to paint out the selected mountain snow areas and clouds.

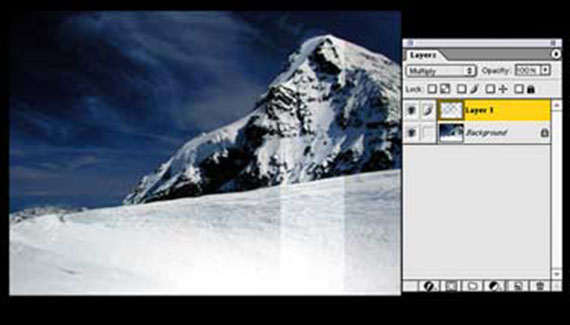
Switching back to the selection mode, I sent the selection to its own layer (Command+J or PC: Control + J) and set the layer’s blending mode to Multiply, causing an increase in the highlight detail in the snowy bank.
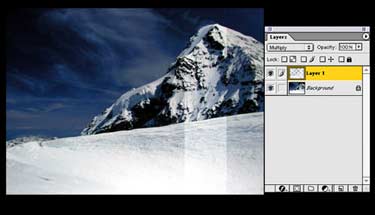
The final screen shot shows the end result with a stripe cut out of the Multiply layer to illustrate the difference between the raw image and the enhanced Luminosity Masked image. I think you’ll agree that it makes a difference.
The beauty of a Luminosity Mask is that it selects highlights as they occur in the image, with feathered or graduated edges.
Next week: the other face of Luminosity Masking.

Excellent tip !! Tried with very good results !! Also would be great if the thumbnails are bigger