

It’s easy to see individual channels in color in Photoshop’s Channels palette–simply select “Color Channels in Color” in Preferences> Display & Cursors. But what if you want to print the channels in color, say as samples for a screenprinter? That takes a few more steps. Each color channel in an 8-bit CMYK image is actually a grayscale representation of the image. When you view a single channel on-screen in Photoshop, it displays, by default, as gray. The Prefs enable you to display each channel in color (which generally makes it much more difficult to see the details of the Cyan and Yellow channels). When two or more channels are visible in the Channels palette, the display is always color.
As you can see, when the channels are displayed in gray and a single channel is visible, it appears that way both in the palette and in the image window (upper-left). When channels are displayed in color and a single channel is visible, it is displayed in its own color both in the palette and in the image window (upper-right). Regardless of how the Channels palette is displaying the channels, when two or more channels are visible, the image window always displays color (lower samples).
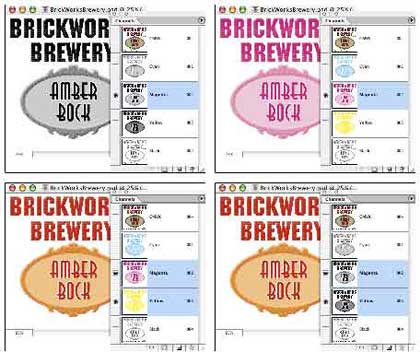
Regardless of whether channels are displayed in grayscale or in color, an individual channel will always print as grayscale. The “separations,” individual channels printed in grayscale, are used to make printing plates or screens. The various levels of gray determine how much of that channel’s ink will be placed on the page in any given spot.
Here’s how you can print color separations in color, and even show the “build” of the four colors as they are applied:
WARNING: Work on a copy of your image, not the original.
1. Open a copy of your artwork in Photoshop. If the image has layers, use the menu command Layer> Flatten Image. From the Channels palette menu, choose Split Channels. (NOTE: This command cannot be undone. However, you can reverse the process with the Channels palette menu command Merge Channels.)
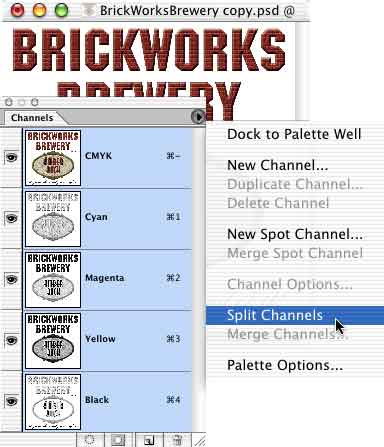
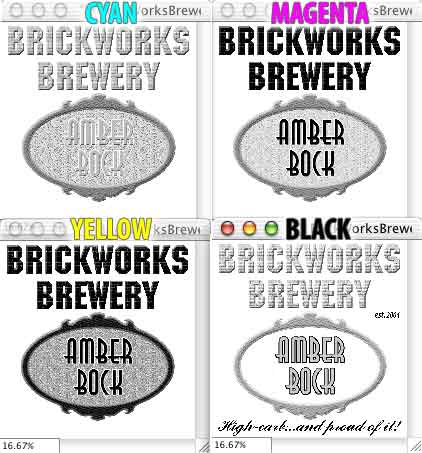
A separate file is created from each color channel in the image. The grayscale images show the distribution of each color throughout the image. In the following image, the channels have been labeled. The individual file names include the channel’s color after the file extension. Be aware that this file naming convention can prevent file type recognition by the operating system. You may need to re-name the files.
2. With the Cyan file active, use the menu command Image> Mode> Duotone. In the Duotone dialog box, select Monotone (which uses a single ink). Click the color swatch to the left to the ink name and define the monotone’s ink as CMYK 100/0/0/0. (You can also select Pantone Process Cyan from the Custom Colors.)
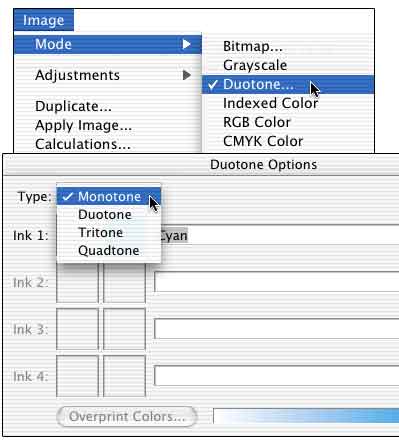
Using the same procedure, convert the Magenta file to a Monotone using CMYK 0/100/0/0 and the Yellow file to a Monotone using CMYK 0/0/100/0. The Black file can be left as Grayscale.

These images can now be printed individually, producing color separations printed in their own colors. (These color separations cannot be used to produce printing plates.)
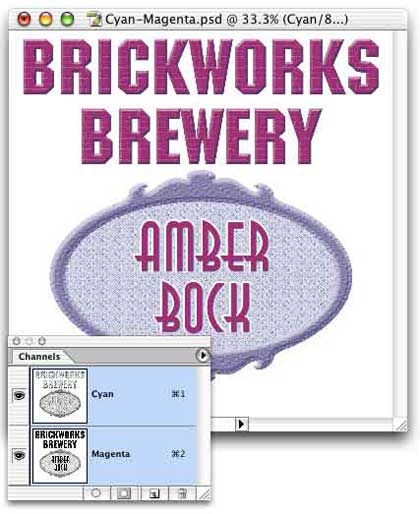
3. To show the “build” of color, make the Cyan file active and use the menu command Image> Duplicate, naming the new file Cyan-Magenta. Convert the image from Monotone to Multichannel mode (Image> Mode> Multichannel). In the Channels palette menu, select the command New Spot Channel. Define the new spot channel’s color as Magenta (CMYK 0/100/0/0) and click OK.
Make the Magenta file active, select all, copy. Return to the Cyan-Magenta image, make sure the Magenta spot channel is active, and paste. In the Channels palette, make both channels visible to see how the two inks will combine.
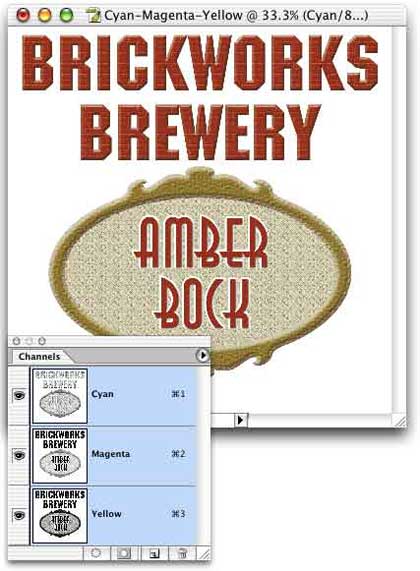
Duplicate this image, naming it Cyan-Magenta-Yellow. Add a new spot channel (CMYK 0/0/100/0). Switch to the Yellow file, select all, copy. Return to the new composite image, make sure the Yellow channel is active in the Channels palette, paste.
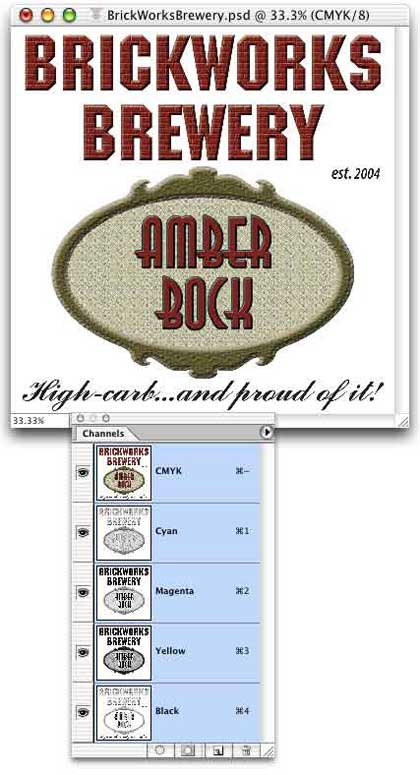
While you could continue, adding another spot channel for the Black channel, there’s really no need — that simply duplicates your original CMYK image.

who’s the writer ?
i just wanna thank him for informations
Thank god someone out there knew what I was talking about and could offer a tutorial. I have been looking everywhere for this. Plenty of people talk about splitting channels and editing them but this is the fist tutorial I came across that clearly explains how to separate and colour each channel specifically.
Thank you.
REALLY THANK YOU!
thanks a lot for above mentioned valuable information.
“These images can now be printed individually, producing color separations printed in their own colors. (These color separations cannot be used to produce printing plates.)”
what is the use of these separation and what the difference between this and separation for printing plates. i would like to know how to do color separation for printing plates.
thanks for your time
regards
nasar