
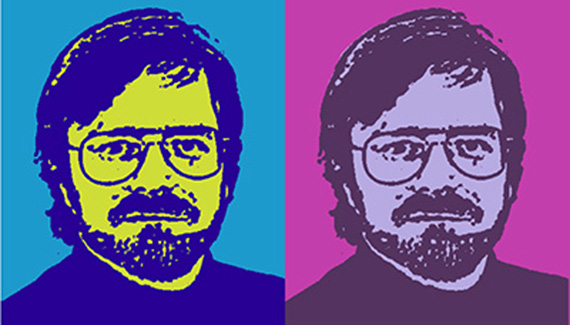
Serigraphs are silkscreen prints that, in the hands of artists such as Andy Warhol, Michael Schwab and Antonio Reboiro, can be exciting, colorful, high-contrast images. We’ll use Photoshop to create a serigraph-like look to a photograph.
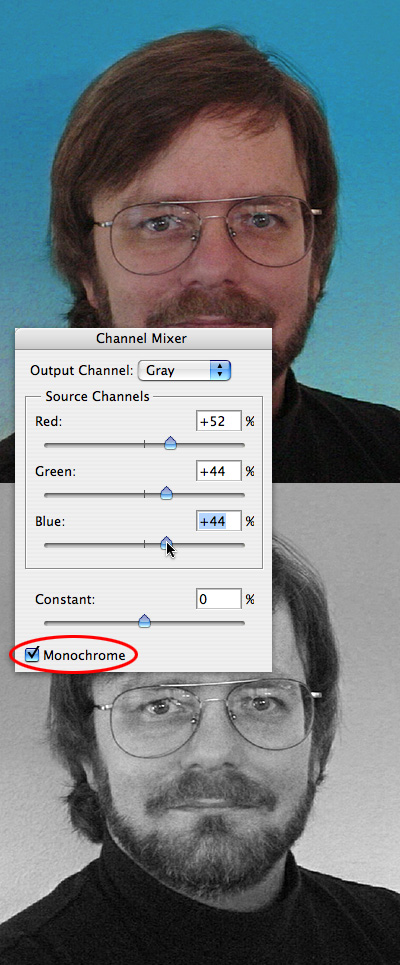
Start with a simple head shot with a plain background. (This simple head is mine.) Feel free to remove the background with a layer mask if it’s too busy. Desaturate the image with the Channel Mixer (Image > Adjustments >Channel Mixer). Set the Mixer to Monochrome, and move the Red, Green and Blue sliders until you have a well-balanced image with decent contrast.

Next, go to Filter> Sketch > Stamp. The Stamp filter creates a high-contrast image (like a rubber stamp). Aim for an effect that gives you enough detail to recognize the face. (For this image, I used a Light/Dark balance of 13 and a smoothness of 1- your mileage may vary.)
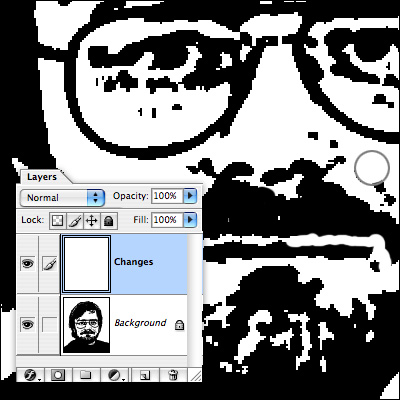
No matter how good the Stamp filter works, you’ll still have some areas you’ll want to paint in with black or white. Add a new layer on top, and name it Changes. Grab a Hard Round 19 pixel brush, and set your color palette to the default black and white by typing the letter D.
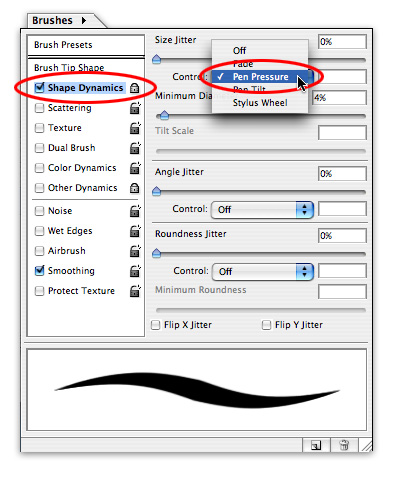
If you’re using a Wacom pen, set the brush to react to pressure with size by going to the Brushes palette, selecting Shape Dynamics and setting the Control to Pen Pressure. With these settings, a firm stroke will give you a fat brush; a lighter touch lets you paint with a thin brush.
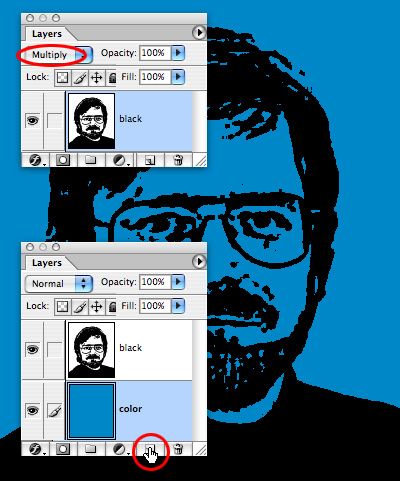
Next, double-click on the top layer, re-name it Black and set the layer’s blending mode to Multiply. Put a new layer underneath it, and name it Color, and fill it with a bright color.
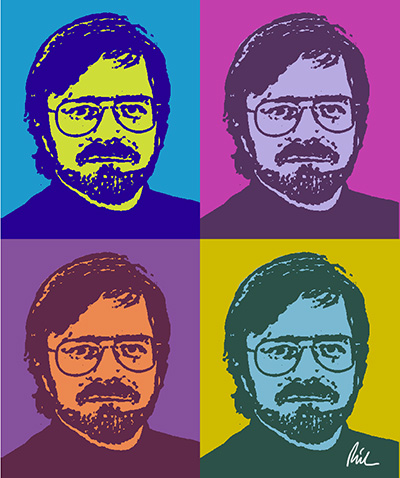
For a really Warhol-esque (is that even a word?) effect, paint on the Color layer behind the face with a contrasting color. Copy and paste the layers, change the colors, and sign your name for a poster ready for the gallery.

this doesn’t work because when i try to stamp my image it looks like the colors get inverted and when i try to turn my image to inverted and stamp it it looks awful
That is cool
nice inspiration!!!
nice tuturial
thx for tutorial but that is the pop art design ^^
Yo dis was gud