

Photoshop’s Unsharp Mask is a great way to add a little sparkle to eyes and a smile-but how do you avoid sharpening the skin and bringing out the wrinkles? Wrangle up the Lasso tool and I’ll show you how to rustle up just the eyes and mouth…
Step 1
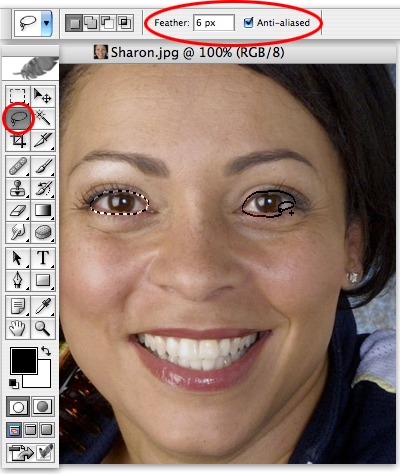
Step 2
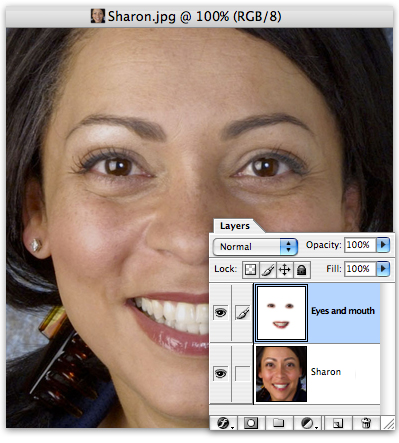
Copy and move the selected areas to a new layer by hitting command/control-J. Double-click on the words Layer 1, and rename the new layer Eyes and Mouth.
Step 3
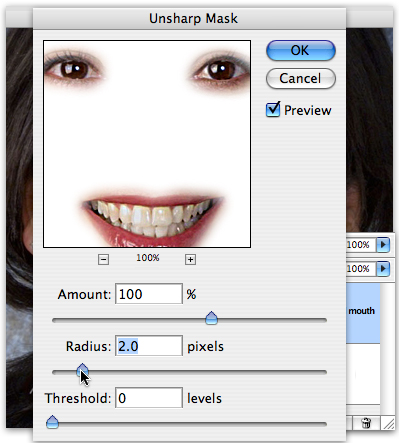
Go to Filter > Sharpen > Unsharp Mask. Set an Amount of 100%, a Threshold of 0 levels, and a Radius of 2 pixels. Feel free to play around with the Radius setting to get nice, sharp, clear eyes and teeth without getting that oversharpened ‘halo’ effect.
Step 4
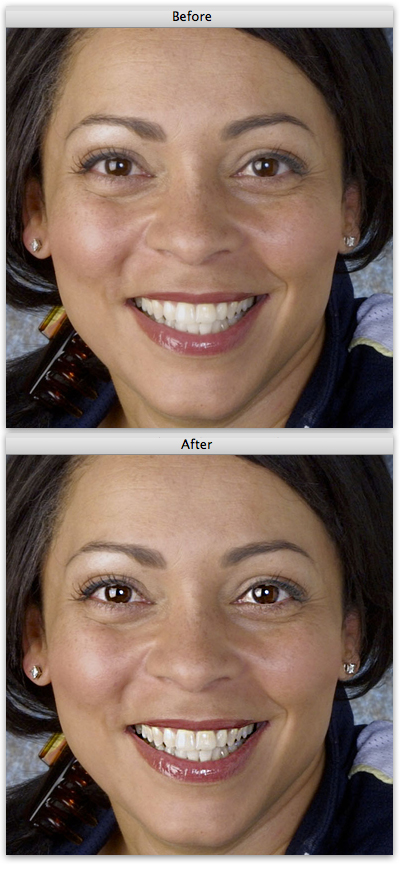
Hit the OK button, pardner, and you’re done- you’ve just lassoed up a pair of eyes and a smile with just a little more sparkle than the average cowhand.

its great…now i can solve some of my querries…
I like it! Nice and quick.
thats so easy, its was hard to found the tool, cause im not english speaker. thanks¡¡
Yo man,this is so simple n great….We can take their smartness to the next level….
it’s a cool and quick guide so thank you.
i wanna add that i think the level of the unsharp is a bit to much and it lost the natural feeling of the overall photo.