

Ever wonder how designers are able to place an image inside text? It takes *years* of practice. Kidding. They do it by creating a clipping group, and it takes 5 seconds. All you need is a photo and a word in which you want to bring that image through. The trick is in the placement of the text and image layers, and the holding down of a special modifier key to make the magic happen.
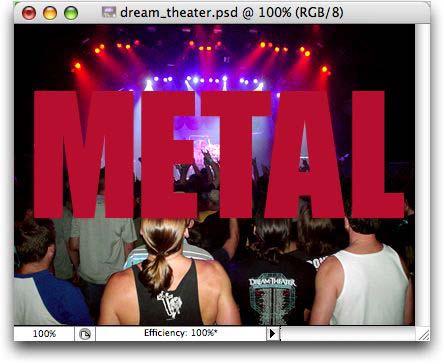
Step 1: Open the image, double-click the background layer and rename it to make it editable. Let us use a photo I shot at a recent concert in Dallas.
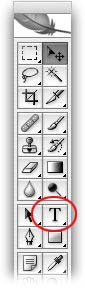
Step 2: Select the Type tool in the main toolbar (just press T).
Step 3: Type a word (such as METAL). Photoshop automatically puts the text on its own layer. It doesn’t matter what color your text is, though here I made it blood red so you could see it better. What *does* matter, however, is that you pick a really big, really thick font; preferably a sans serif (see note below), slab (extra thick) font. For example, I chose Impact at 260 point. You may also want to type in all caps–something I rarely advise–in order for more of the photo to show through.
NOTE: Serif refers to the little “feet” or “sandals” you see on the descenders and ascenders of some fonts, such as Times. These are called serif fonts, and are typically used as body copy in newspapers (studies show they are easier for the eye to follow in large blocks). Sans serif means “without feet” or “sandals”, like Helvetica, Arial, and Verdana. These fonts are typically seen used as headlines, and for large blocks of online text (studies show that sans serif fonts are easier to read in large blocks online–are you listening Macworld.com?!).
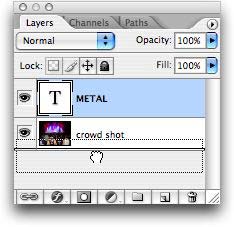
Step 3: Click and drag the type layer *below* the image layer. If you don’t do this, the technique will refuse to work.
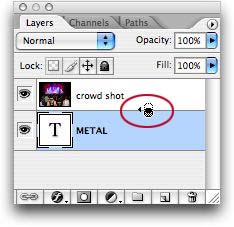
Step 4: Hold down the Option key (PC: Alt) and click between the two layers, as shown below. The cursor will morph into two over-lapping, black and white circles and that’s when you click.
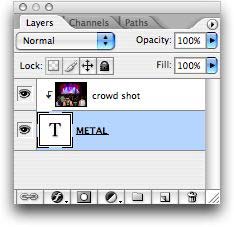
Your Layers Palette should now look like this:
Step 5: At this point you can click back on your type layer, then click back on the document and move it around with the arrow tool, to get just the right photo bits to show through.

You can also play around with the type size, and/or the Transform tool (to make the type wider, taller, or both).
For even more fun, play with effects on your type layer. I added an outer glow with a bit-o-purple I sampled from the image, plus a 2 pixel center stroke with yet a different shade of purple (again, sampled from the image). I filled a new layer with black and stuck it on the very bottom of my layers stack. Here’s my final image:

Kinda makes you wanna go to a rock concert doesn’t it?! I knew it would 🙂
Come see me next week and I’ll show you another cool trick using a photo inside type.
The Graphic Reporter
http://www.graphicreporter.com

awsome……..man……………….awsome
this trick gave me a job
awsome this is sooooooooooooo cOOOOLLL lol im so dummmm. 😀
nice one, good tutorials…………..