
Recreating Apple’s iWeb photo reflection effect
With Apple’s release of iWeb — an amazing web site building tool — I’ve been getting a steady stream of emails wanting to know how to recreate the nifty photo reflection effect which appears at the top of iWeb pages and in the slide shows (here’s a sample). Adding such a reflection is a super easy way to add depth and a bit of sophistication to your photographs.
Today I will show you how to create a reflection of your very own in Photoshop, and we’ll do it in a manner that retains maximum flexibility within our document so you can plop your photo onto any color background you want.
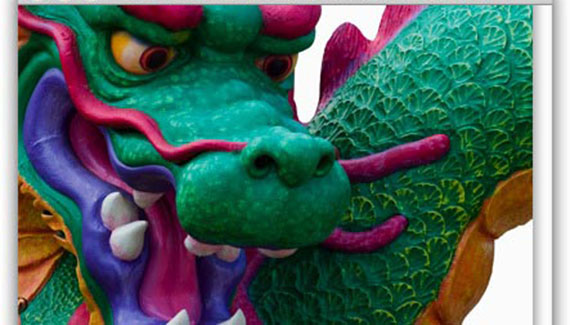
Those of you who’ve been listening to my graphics tip on Your Mac Life show know that I’m slightly enamored with dragons at the moment (I’m halfway through Eldest by Christopher Paolini). With that in mind, I took a journey to iStockphoto.com and searched on the keyword combination: dragon fantasy. And just to prove that iStockphoto really does have the perfect image for any project, (beams with pride) look what I found:
Preparing the photo
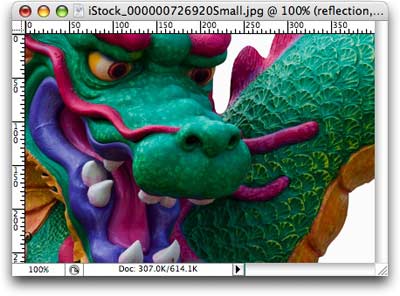
Step 1: Pop open a Soon To Be Beautifully Reflected Photo, and immediately duplicate the Background layer by pressing Command + J (PC: Ctrl + J).
TIP: If you have nothing selected (no marching ants) Command + J duplicates the entire layer. If you do have a selection, Command + J pops just that portion up onto its own layer. This is a handy keyboard shortcut to have in one’s bag-o-tricks.
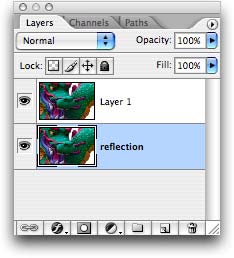
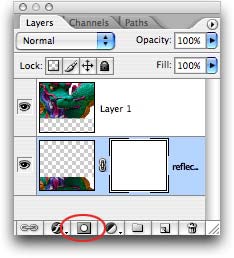
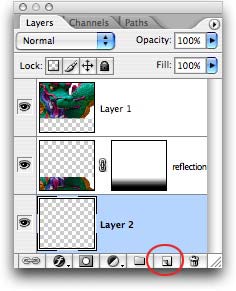
Step 2: Double click the Background layer so that it becomes editable, and name it “reflection”. This is what my Layers Palette looks like now:
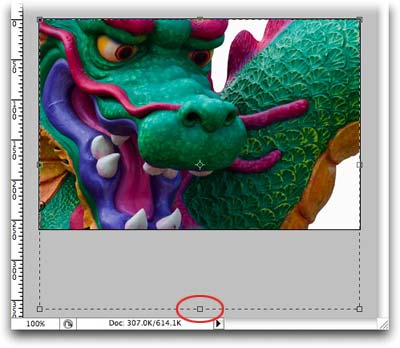
Step 3: We need some room for our reflection so let’s increase the canvas size. Press C to select the Crop tool, draw a box around the image, and drag the bottom handle out a ways as shown below. Press Return to accept the Crop.
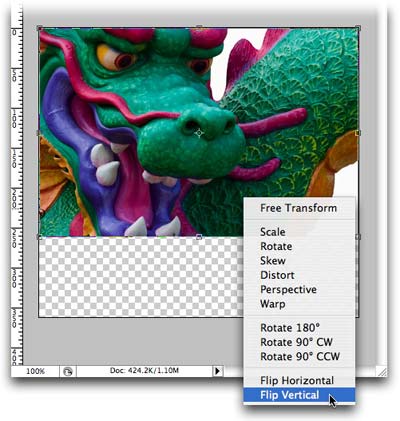
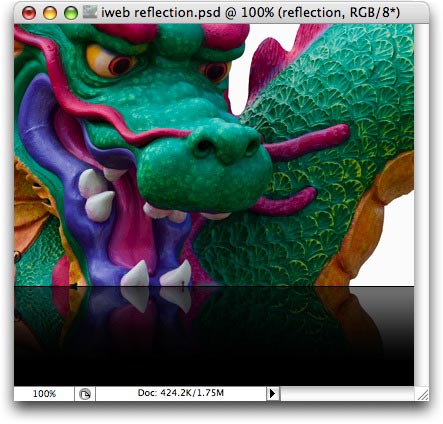
Step 4: While the reflection layer is still selected (it’ll appear light blue in the Layers Palette), press Command + T (PC: Ctrl + T) to invoke Free Transform. Control click (PC: Right click) within the transform box and a contextual menu will appear. Choose Flip Vertical and press Return to accept the transform. This flips the reflection layer upside down.
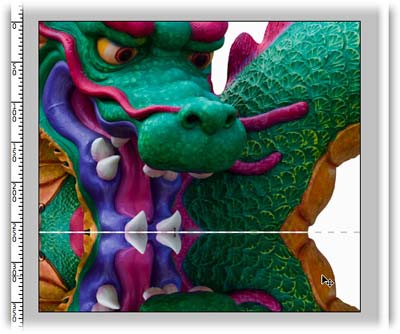
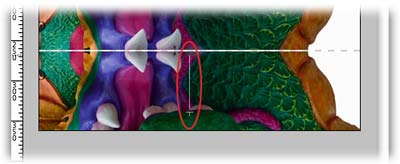
Step 5: Press V to select the move tool. Press and hold the Shift key while dragging the reflection layer to the bottom of your document, so that the ends of the two photo layers *almost* meet. For the iWeb reflection effect, you want to leave a 1-2 pixel gap between the photos, like so:
TIP: Holding the Shift key while moving a layer locks it into place horizontally (or vertically), depending upon the direction you’re dragging. Just another example of how Photoshop helps to protect us against ourselves.
Fade it out
Step 6: Add a layer mask to the reflection layer by clicking the circle within a square icon at the bottom of the layers palette.
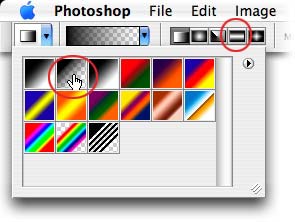
Step 7: While the mask is still selected (note the tiny hairline border around it above), press G to select the Gradient tool. From the options toolbar at the top of your screen, choose Foreground to Transparent from the pop-up menu, then click the Reflected button, as shown below.
Step 8: Back on the document, click towards the bottom of the image and then drag upward to roughly the height you’d like the reflection to be. I held the Shift key down to lock the gradient into being perfectly straight.
TIP: If you’re nonplussed by your first Professional Gradient Dragging Attempt, just give it another go.
Add a background
Step 9: Command click (PC: Ctrl click) the New Layer icon at the bottom of the Layers Palette. TIP: Holding the Command (or Ctrl) key makes the new layer appear below the current layer. Very handy indeed.
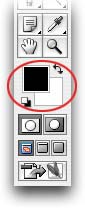
Step 10: Take a peek at the color chips at the bottom of the main Toolbox. If necessary, press D to set them to the default of black and white, then press X until black hops on top. Fill the new layer with black by pressing Option + Delete (PC: Alt + Delete).
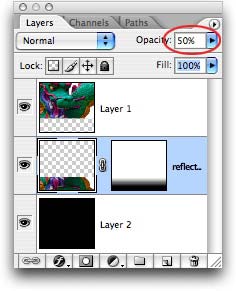
Step 11: To complete the effect, select the reflection layer and lower the opacity to about 50%.
Here’s the final result:
See how easy that was? And flexible too: By choosing a foreground to transparent gradient and by putting the black background on its own layer, you can experiment with your background color, and make it match whatever you want to place the photo on. Here’s the final result on white:

Until next week, may the Photoshop force be with you all 😉
The Graphic Reporter
http://www.graphicreporter.com

very helpful! thank you!
hi there,
Somehow, i cannot do the same as you mention in step 10, it is like a black mirror…. but anyhow.. the results is not the same as yours…. can you help ??
this is so good! thank you!
I attempt to replicate your steps word for word, but for some unknown reason the gradient tool will not apply to the layer, i have attempted this multiple times I flip the original move it down create a layer, select it, select the appropriate gradient tool and aspects, drag the line from bottom to top and nothing appears on the layer, some help would be great. Thanks
Hi there,
I have placed a “cut-out photo” on iWeb that shows the background cut out being transparent on the iWeb but once i published it, the cut out transparent bit becomes black patch, can you please advise how to i rectify that? You can see that problem on my web page ” AbacusSMA.co.uk under “SMA System” where the photo with the girl in red and the baby genius. Something wrong with iWeb?
Many thanks in advance
Great Tute! Exactly what I was looking for. Worked perfectly. I will be checking back here often from now on. Thanks!
Exactly what I was looking for. I have bookmarked you. Thank you!
very useful thanks…
I just want to tell you how awesome this is and how many times I’ve used it (like 3 times today)!
wow. this was EXACTLY what I needed! the instructions were simple and easy-to-follow. thanks!!!
Excellent, thank you soo much!
This is awesome!!! Works great!!! Here is what I have tried: http://www.flickr.com/photos/chadaga/3203584828/ Not sure if this is the right reflection for product photography!
Saved me precious time — great result! Thank YOU!
Excellent step by step example.
excellent tutorial, just now read it and do it step by step, i success. hope from u we will get more tutorials.
thanks a lot again.
thanks, this was really cool! ive been looking for a tut on how to do this 😀
excellent! thank you so much! it’s exactly what I was looking for (and thanks Google Feeling Lucky)
Thank you for such excellent step-by-step directions!
thank you so much i love your step by step and it was really easy to follow. made my background i made for some one a whole lot better. again thank you
wow.. thank you so much…i really appreciate it,, youre so great!
Thank you! It really helped!
Amazing – really high quality. Very accurate on the settings, thanks a lot!
This tutorial is simple and easy to follow. Step-by-step, the photo thumbnails reinforced the instructions. Kudos!
This simple reflection trick will work only on framed images with solid backgrounds and is not universal (fits only one given colour).
The major problem is that the Adobe folks still didn’t bother to add the directional feather or gradient transparency function even in the PS CS4 version (Corel had it already 10 years ago). Which forces to use all these unelegant and tiring tricks.
The only way to overcome it on free-shape images with no bg is still to use the gradient eraser.
Don’t forget to skew the reflected object if it is captured at some angle, so it is lined up with the main object along the bottom.
The output artwork should be then saved with png24 format with transparent bg. It can be universally planted then on any colour, on any gradient bg.
super cool! like the short cuts too!
brilliant! will use again
GREAT info…many thanks!
I have been using this technique but cannot figure out a way to do reflections on round images – a bit difficult to explain in words, but hav ea look at the first photo in my slideshow here http://www.amandamaddox.com/product_photography.aspx you will see I have cosmetic cream tubs, which are round, and the reflection doesnt look very real because its a straight line reflected below. Any ideas how to produce a realistic surface reflection on these?
Thanks for sharing your skills dude, it really helps.
I am having trouble trying to add reflection to one of my photos, its a fairly colourful one. I am using photoshop elements 6.0 and tried to add the reflection but it wont work.
Can this be done in the photoshop I am using. Could you please help me? Thankyou
Very good , thank you.I like the one using the black gradient.
Just what I was looking for. Thank you!
Nice i am looking for this
Very nice thank you for posting.
Thanks for the post. Very useful.
Excellent tutorial – thank you!
I am searching for this. I found it here. thanks for sharing
Just awesome!, saved me a lot of trial and error! thanks!
This is a great tutorial, which I can share with my students!
Thank You very helpfull you guys are amazing keep it up
Thanks, good work!
Great tutorial, Very helpfull. I give you 5 stars if any rating
Great Work and Thanks dude
Very interesting tutorial. Simple technique but it works!!
Nice.. thanks for sharing… I was able to make a sweet reflection image today.. good work!
An amazing tutorial! I stumbled on your page when I was trying to find some tutorial to improve my product photography. This would massively improve the images on my site. Thank you for sharing your knowledge! 🙂
Great info.. Really nice tutorial..
If the gradient won’t work, make sure you aren’t trying to apply it to your original background – it is a locked layer. Apply the Flip transform and gradient mask to Layer 1 instead.
Very nice blog post, easy to follow and well documented! Was looking for photoshop reflection effect and came across your site, keep up the great work 😀
this helped me sooooooo much! Thank you, I am using this technique for my yearbook cover project and it just looks amazing. Once again thank you very very much! 🙂
thank you for the info, just what I have been looking for!!
Thanx 4 da tut =)
Cool buddy i have done it and it works thanks for the tutorial …….
Cheers. Works great!
Good, its perfect. Thank you for your lesson.