

Photoshop’s Transform> Perspective command is grayed out when you have a type layer active in the Layers palette. That gives you a choice of rasterizing the type layer or not using the Perspective transformation. Or does it? What if you could add perspective to type without rasterizing the type layer…? “Perspective.” It adds depth to the artwork, the idea that the object extends into the distance. In nature we see perspective primarily through a decrease in size the farther the object is from us.
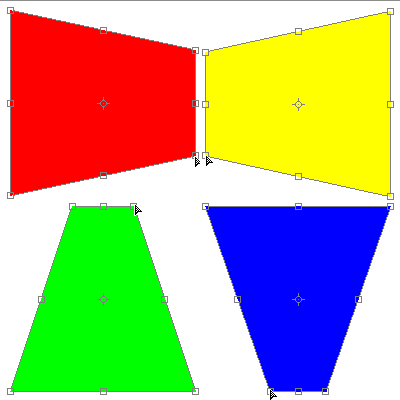
In Photoshop, we make a selection and use the Edit> Transform> Perspective command. Click on a corner anchor of the bounding box and drag to adjust the shape of the object. Which corner – and whether you drag in or out – determines the “distance” you add to the artwork.
NOTE: When you use a Transform command, you’re resampling the selection, changing the number of pixels used to reproduce that part of the image. Photoshop uses the resampling algorithm specified in Preferences> General for Image Interpolation. This can degrade the appearance of the selection. Generally speaking, the Bicubic algorithm is acceptable. If you will be reducing the number of pixels by dragging inward, Bicubic (Sharper) is a good choice.
Okay, then, what about working with a type layer? The Transform> Perspective command isn’t available for a type layer. You can, of course, rasterize the type layer (converting the editable vector type into a mass of pixels) to create perspective. However, once you do, you can no longer edit the text as type (selecting characters and over-typing them, for example, or changing the color of the type).
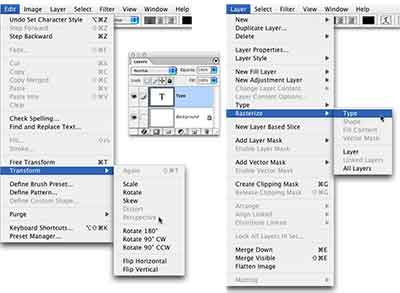
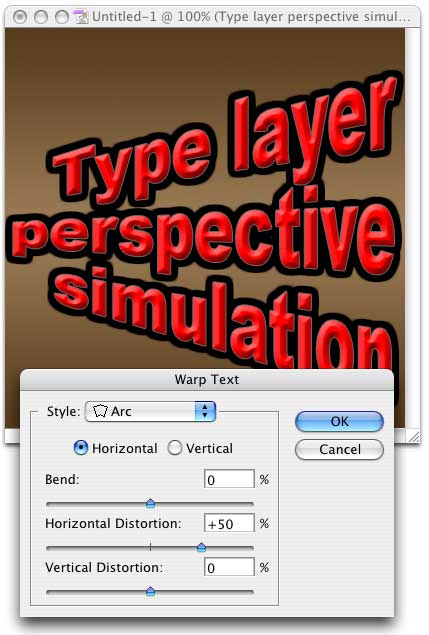
You can add a perspective to a type layer using the Type Warp option. (Open Type Warp by clicking the button to the right of the color swatch in the Options Bar when the Type tool is selected.) Set the Bend field to zero, then adjust the Horizontal Distortion or Vertical Distortion field to simulate perspective. (It doesn’t matter which of the warp styles is selected.) It’s not as accurate as rasterizing and using Transform> Perspective, but it’ll present the appearance while leaving the type layer fully editable.

this is not a TUTORIAL…it just says what things do, not how to do them.
That’s why it’s a “Tutorial” and not a “How-to”..
Main Entry: tutorial
Function: noun
Date: 1923
1 : a class conducted by a tutor for one student or a small number of students
2 : a paper, book, film, or computer program that provides practical information about a specific subject
I guess you’re right…and you only needed to put the first line, I didn’t need a definition.
Oh, come on, guys, this is a pretty cut’n’dry lesson, even for a relative beginner. I do, however, want to point out that this method doesn’t actually get you perspective like it says it does. The letters should get proportionately smaller as they fade. Here they just get shorter, maintaining their width. To make perspective look real, you’l justl have to rasterize. Or use Repoussé.