Hi, first of all love all the tutorials and also thanks as they have taught me a lot I am a total novice but am having a little trouble. when I select the smudge tool or brush tool it just appears as a crosshairs with a dot in the middle instead of looking the like the outline of my image??? how can i rectify this please?? thanks
Dear sirs,
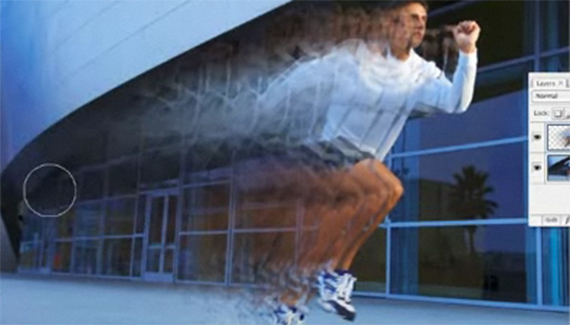
Can somebody help me with a function that I can’t realise in CS4. I try to “Select” the picture after define the runner. This is impossible in SC4 because when I clic on selection, I have several possibilities; select all ; deselect ; ,,,
hey i got a problem okay when u used the lasso tool and then pressed cntrl j to make it into a layer and into a brush when i did that with my image it also included the background how did u turn on the lasso on new layer to show withought getting background


wow dude that tutorial is sick thx man
If you were my college math teacher. . .I would have my degree now!
everything is clear and concise
plus it’s just plane COOL
love your tutorial~~^^
Great tutorial!
Mine worked great!
That last effect on the text was very impressive..how did you do that????
Hi, first of all love all the tutorials and also thanks as they have taught me a lot I am a total novice but am having a little trouble. when I select the smudge tool or brush tool it just appears as a crosshairs with a dot in the middle instead of looking the like the outline of my image??? how can i rectify this please?? thanks
ps i would also love to know how you did the last “flash” effect on the text!!
this is a masterpiece.
I love your all tuts
THANKS A LOT U R THE BEST
Dear sirs,
Can somebody help me with a function that I can’t realise in CS4. I try to “Select” the picture after define the runner. This is impossible in SC4 because when I clic on selection, I have several possibilities; select all ; deselect ; ,,,
Thanks for your help, Danny
hey i got a problem okay when u used the lasso tool and then pressed cntrl j to make it into a layer and into a brush when i did that with my image it also included the background how did u turn on the lasso on new layer to show withought getting background