As a person who loves texts effects and experiments with them myself, I offer this tidbit of a suggestion: If you anticipate changing the editable type (as Corey did), first apply the “buckshot” effect on the text layer mask, then group that text layer and apply a second layer mask with your edge masking. Since the buckshot mask is a random effect, you’d really only need to change the group layer mask for the edges of the text should you decide to change it. (P.S. Corey: Is it just a coincidence that you posted this tutorial only days after the A-Team trailer came out? The text effect at the end of the trailer is similar to this tutorial. Hmmm)
Alright, the texture combination effect is incredible. Just overlaying a few different texture effects can make some new and very interesting textures in themselves. Great tutorial, incredibly neat effect and you make them all seem so simple whereas it makes us think, “Wow, how did I not think of that?” Wonderful job!
The tutorial does resemble the effects used in the A-Team trailer. Was already looking forward to that tutorial. We can already experiment with it now, thanks!
ps I wouldn’t mind another – more official – A-team trailer effect tutorial tho 😉
I recently started following these tutorials, and I find them really useful. You do not just show what steps you do, but you show what the different tools you use do… and you mention lots of little other tricks that you use and that I never knew.
Also, rather that using the clipping group, try saving the texture layer as a pattern and then apply a pattern overlay layer style to the text layer (as well as the drop shadow and bevel and emboss). To the best of my knowledge, it all works out the same.
I would love to learn how to make a 3D vortex, especially with binary numbers on it. I tried with the donut tutorial, but was unable to figure out how to elongate it enough.
Debbi
Having always used a pc (last 18 years) and dabbled a lot with photos and photoshop,I purchased my first imac yesterday.I was wondering what version of photoshop to use on my new imac… googled a search and ended up at this page with its stunning tutorials !! THANKS What an inspiration,at 56 I have a new hobby,I have bookmarked this page and will be back regularly.
It just goes to show you’r never to old to learn new tricks 🙂
Corey,
I have been an avid NAPP and Kelby Training member for several years and I devourer all the video tutorials I can find. I just have to say this, of all the PhotoShop guys, you are absolutely BRILLIANT! I’m so thankful for all I have learned from you.
Stephen
hey, looks like there’s something wrong with the tutorial. it plays till you’re about to merge down the layers and then it stops and comes back to the start.
thanks for the tutorials, i find them all extremely useful :).
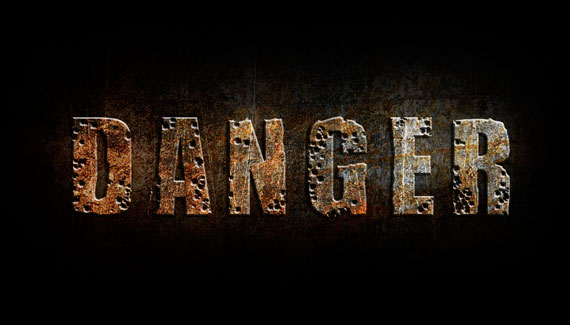
Incredible keep up the GREAT work. as a happy accident while following your tutorial I made what appears to be shotgun blast on the text with grainy exposed concrete. While using the burn tool to slightly darken the background I accidently applied the burn to the text and discovered the effect. I used the Burn tool at 33% exposure on highlights and Voila!
Thanks again


Great stuff.
As a person who loves texts effects and experiments with them myself, I offer this tidbit of a suggestion: If you anticipate changing the editable type (as Corey did), first apply the “buckshot” effect on the text layer mask, then group that text layer and apply a second layer mask with your edge masking. Since the buckshot mask is a random effect, you’d really only need to change the group layer mask for the edges of the text should you decide to change it. (P.S. Corey: Is it just a coincidence that you posted this tutorial only days after the A-Team trailer came out? The text effect at the end of the trailer is similar to this tutorial. Hmmm)
Great tut Corey! Love the combination of different textures together.
Alright, the texture combination effect is incredible. Just overlaying a few different texture effects can make some new and very interesting textures in themselves. Great tutorial, incredibly neat effect and you make them all seem so simple whereas it makes us think, “Wow, how did I not think of that?” Wonderful job!
The tutorial does resemble the effects used in the A-Team trailer. Was already looking forward to that tutorial. We can already experiment with it now, thanks!
ps I wouldn’t mind another – more official – A-team trailer effect tutorial tho 😉
Corey! please use ctrl-alt-shift-e to merge all visible material into one layer instead of using the menu. Part from that, wonderfull tutorial.
you never let us down with your tutorials pls keep up!!!!!!!!
Corey: Do you have a tutorial on how to create one of those PLASMA Ball effects in a glass cylinder; with the electricity flare like tenticles?
I recently started following these tutorials, and I find them really useful. You do not just show what steps you do, but you show what the different tools you use do… and you mention lots of little other tricks that you use and that I never knew.
I love working with textures, the possibilities are endless. Thank you for showing just another element as to how much further we can go.
Hey comes no HD? 🙁
Wicked tutorial…especially cool towards the end!!
Cool tutorial……………….good info and easily understood. Thanks, Corey
Very nice, especially the ‘bullet holes’ effect. The merged backgrounds reminded me a lot of the one used for the BioShock game logo.
note to self, shoot more textures
I never thought about combining textures!
Also, rather that using the clipping group, try saving the texture layer as a pattern and then apply a pattern overlay layer style to the text layer (as well as the drop shadow and bevel and emboss). To the best of my knowledge, it all works out the same.
Love your tutorials Cory!
I would love to learn how to make a 3D vortex, especially with binary numbers on it. I tried with the donut tutorial, but was unable to figure out how to elongate it enough.
Debbi
Having always used a pc (last 18 years) and dabbled a lot with photos and photoshop,I purchased my first imac yesterday.I was wondering what version of photoshop to use on my new imac… googled a search and ended up at this page with its stunning tutorials !! THANKS What an inspiration,at 56 I have a new hobby,I have bookmarked this page and will be back regularly.
It just goes to show you’r never to old to learn new tricks 🙂
Corey,
I have been an avid NAPP and Kelby Training member for several years and I devourer all the video tutorials I can find. I just have to say this, of all the PhotoShop guys, you are absolutely BRILLIANT! I’m so thankful for all I have learned from you.
Stephen
Amazing tutorial as usual!
Does anyone has the backgrounds Corey used?
Thanks,
Yuval.
THANKS!
Very very useful 😀
Thank you. I learned a few things that I have wanted to learn for a while.
hey, looks like there’s something wrong with the tutorial. it plays till you’re about to merge down the layers and then it stops and comes back to the start.
thanks for the tutorials, i find them all extremely useful :).
love! thanks a lot!
Great tutorial. I’ve watched it at work where haven’t got access to PS and can’t wait to go home and try it out.
thanks
Monika
Really really cool!
Just fantastic! As Bob Murray said, above: must shoot more textures! I love that about 80% of your tutorials are very doable in Photoshop Elements.
Corey is just so awesome and easy to follow! Im learning a lot… so happy I found this site. Thank you!
Great Tutorial. Thanks. Used it in my blog (http://munntilmunn.no/2010/08/17/snakkere-vs-foretak-hvem-er-mest-troverdig/)
Everyday is a school day!
I can’t do to merge Visible..can u help me
THANKS! Your tutorials are always simple and awesome at the same time
By the way, I usually do the same with Bevel and Emboss
And the bullet holes rule!
That was so fun and so cool. Thank you so much.
Incredible keep up the GREAT work. as a happy accident while following your tutorial I made what appears to be shotgun blast on the text with grainy exposed concrete. While using the burn tool to slightly darken the background I accidently applied the burn to the text and discovered the effect. I used the Burn tool at 33% exposure on highlights and Voila!
Thanks again
Thats great tutorial form you.Thanks for sharing your knowledge.