
I am going to show you how to create a medal here.. We are going to create a medal for the fictitious “snow bike” category in the fictitious 2001 Olympics, sorry purists 🙂
Begin with a blank canvas at 72ppi and RGB mode.
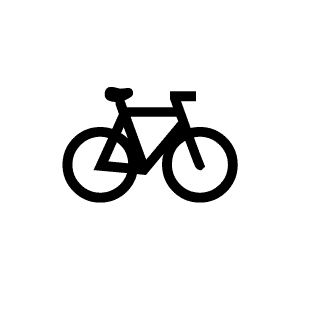
Import your art onto a separate layer. I used the font “webdings” here with the letter “b” which happens to be a bicycle.
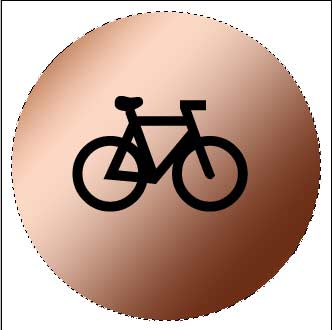
Using the elliptical marquee tool draw a circle around the bike.

Create a new layer and fill it with the default copper gradient.
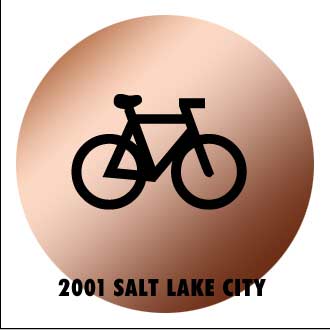
Add some type. “2001 Salt Lake City.”
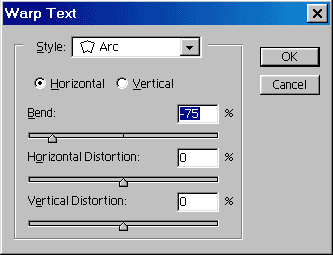
Lets wrap the text to the circle.
On the toolbar, click the warp text tool.
![]()
Choose arc and adjust the bend to suit. Tip: You can drag the text to a different position while this tool is active.
Here is the result so far.

Lets make the Olympic rings.
Create a new layer and using the elliptical marquee tool make a circle. Hold the shift key to constrain to a perfect circle.
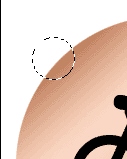
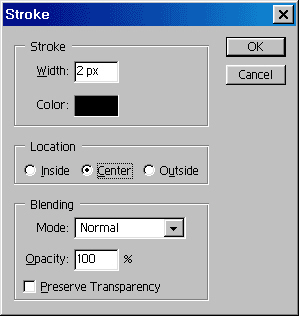
Edit>Stroke
Use a 2 pixel black stroke to create a ring.
Now here is a great tip to duplicate the rings:
Press Ctrl/Cmd+Click the layer thumbnail to load the ring as a selection.
Press the alt/option key and click on the ring and drag a copy. Do this 3 more times to create all 5 Olympic rings.
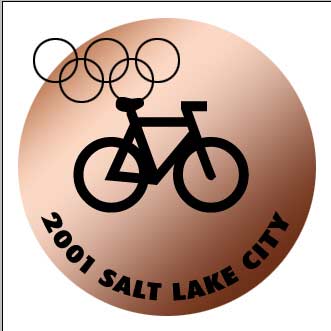
Position everything and add the word “Olympic” in a suitable font.
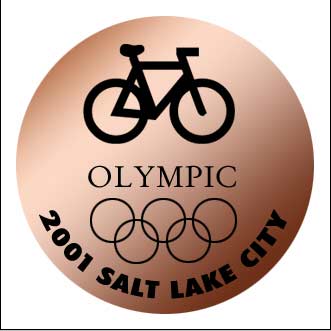
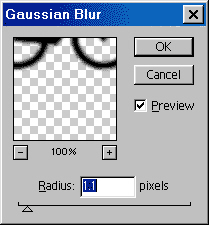
Merge the bicycle and “2001 Salt Lake City” text.
Filter>blur>gaussian blur
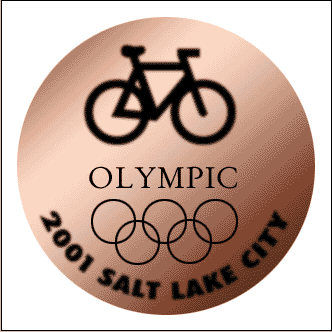
Run a 1.1 pixel Gaussian blur, this will cause these elements to blend more smoothly with the coin.
The result
Ok prep time over. Lets make this puppy pop!
Start with the bike layer. Double click the layer name to open the layer styles box.
Copy the settings from the bevel box. Don’t forget to change the gloss contour.
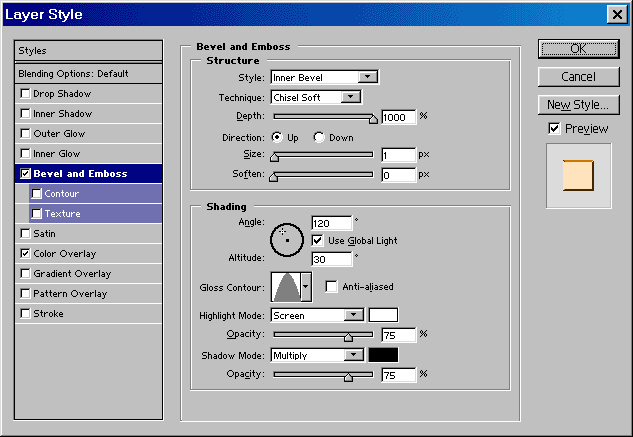
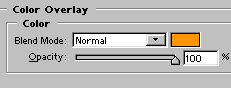
Choose a color overlay and select orange as the color.
Its beginning to take shape.

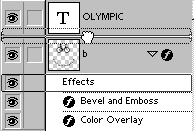
Copy the layer style to all the layers.
You can do this by just clicking on the word “Effects” and dragging it to any layer you want and the effect will be duplicated.
Here is our medal with the layer style applied to all layers.
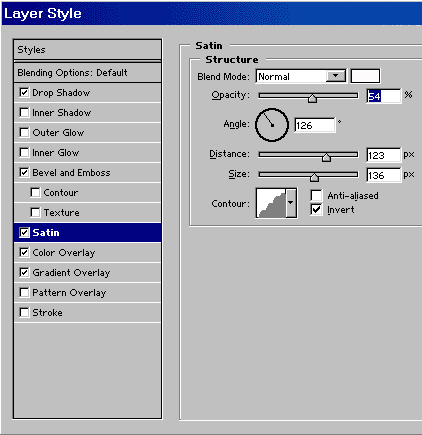
Lastly we will modify the style on the coin surface to produce a realistic result.
Double click the word “effects” to open the dialog box again.
Make these changes to the bevels setting.

Add a default drop shadow.
To get a nice shimmer, apply the satin effect.
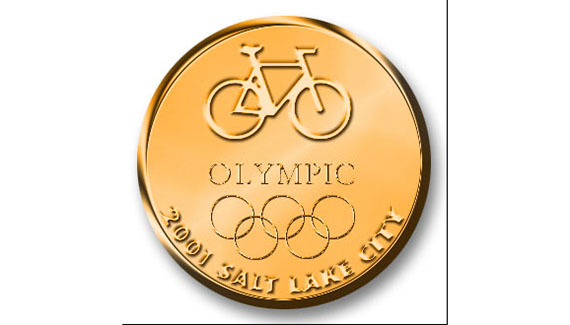
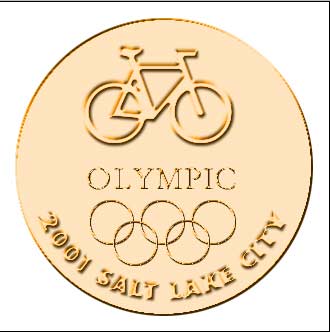
Here is our finished medal.

I hope this weeks article inspires you to create all kinds of medals and coins.
See you at the caf© www.photoshopcafe.com

Perfect tutorial. I’ve volunteered to make metals for all of the teachers at my son’s preschool (olympic theme- get it?) and am at a total time crunch. But as a designer I need to do something fabulous. Now I can and I don’t have to worry about the time. THANK YOU
Thank you for the excellent tutorials.
I just want to point out that the first layer style option box appearing along the “medal” tutorial is illegible (at least on my monitor).
Thank you again.
Yours,
D.N.
thats freaking awesome!!!!!!!!!!!!!!!!!!!!!!!!! im gonna make it when i get home
I am unable to activate the layer settings for the bike and 2001… because of the previous “merge” of both layers. Did I miss something?
Thank you for this tutorial. It is extremely helpful!