
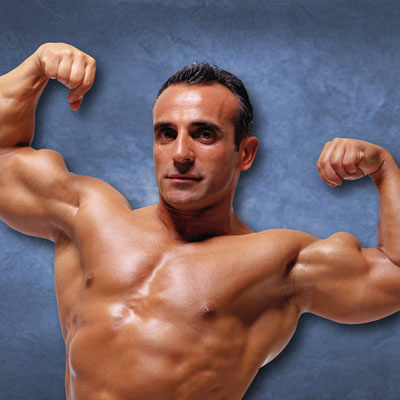
Have you ever wondered what you would look like with a different body– ripped, toned and ready to flex? Photoshop gives you the chance to check yourself out, as we will with this body, courtesy of Photodisc…
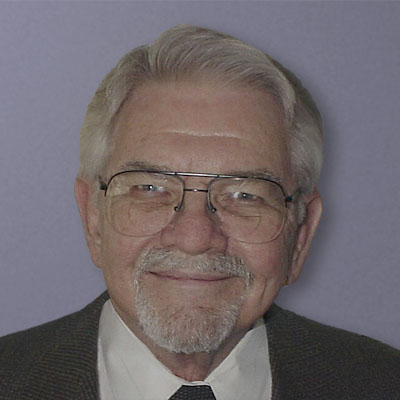
and this head, courtesy of my dad.
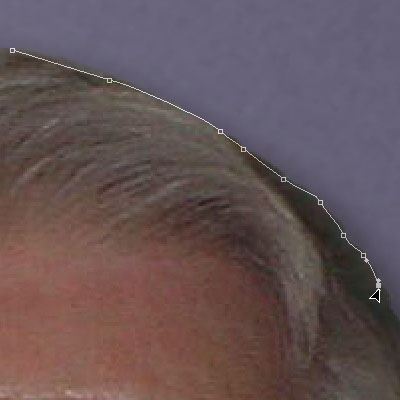
Step 1
Start by using a pen path to select the replacement head.
Step 2
Next, copy and paste the new head over the buffed up body. In this example, the head was a little big for the body, so I lowered the layer’s opacity to 80%, and used the Free Transform tool (Edit > free Transform…) to shrink the head to a more appropriate size. (I lined up Dad’s eyes and mouth to the original head to achieve a more natural look.)
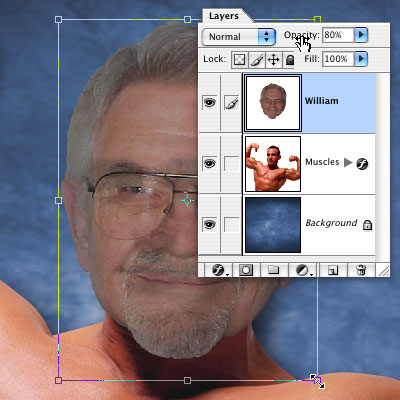
Step 3
Dad’s head is nicely sized, but the colors of his head and his new body don’t match– let’s see if Photoshop’s Match Color can help.

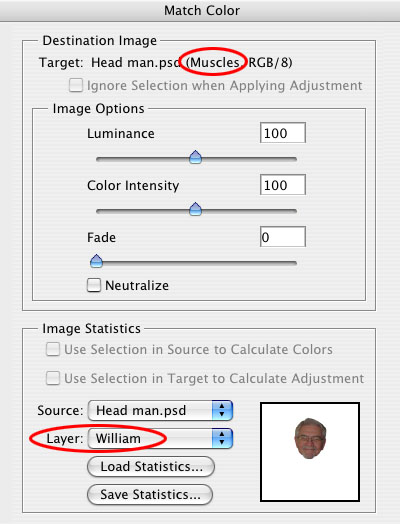
Step 4
Select the layer you want to change the color of– in this case, the Muscles layer. (The muscular man is on his own layer, separate from the background layer, otherwise the color shift includes the background colors.) Go to Image > Adjustments > Match Color. In the dialog box, you’ll see the layer you’re changing at the top (Muscles). Under Image Statistics, select the source and the layer that the color to be matched is on– in this case, William. Hit return to create the transformation.
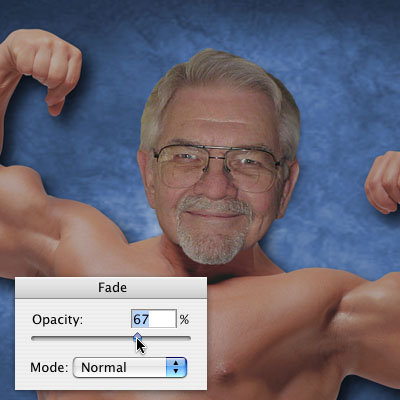
Step 5
Fade the opacity a little if needed, and there you go– a brand-new body, and no steroids needed!

Ummm I have a tutorial that you don’t have on your sight, it’s adding make-up to a person’s face. (sorry it had nothing to do with this tutorial)
OMG!!! This was soo helpfull.. i had no idea how people did this until now thank you so much. its kinda complicated though i was wondering if you could to a simpler version in the future maybe?
It would be nice if you would make a tutorial that totally explained each step – Then people like me ( that know nothing about photoshop) could actually use the tutorial. Isn’t a tutorial for people to learn? How can you learn to do something if you don’t explain each step as if the user has no idea what to do next.
i love it thank you