
Explaining “Image Resolution” and View > Print Size
Clear your mind. Clear your head. Here’s a different way to consider the term “image resolution.” It’s nothing more than an instruction to a printing device about how large to replicate each pixel. It’s a printing instruction about pixel size. Nothing more. And Photoshop’s View> Print Size command? Ignore it completely. Image resolution as pixel size
The term “resolution” crops up in a number of different ways. There’s image resolution, printer resolution, monitor resolution, scanner resolution.and we won’t even mention your last New Year’s Resolution.
Open an image, any image, in Photoshop. In Photoshop’s Toolbox, double-click on the Zoom tool icon. That zooms your image to 100%. Now open the Image> Image Size dialog box. Uncheck the Resample box. Note that the upper part of the dialog box is grayed out — any changes made will not alter the number of pixels in the image; only the Document Size fields are available. (Prior to Photoshop 6, that area of the dialog box was more appropriately named “Print Size.”)

Double-click the Resolution field and enter a new value, any value, then click OK. Notice any difference in the image? Nope! None. No change at all. Photoshop is still working exclusively with the pixel dimensions. The actual content of the image file is unchanged when you change the resolution without checking the Image Size feature’s Resample box.
Here’s the deal:
–Each image consists of a given number of pixels. (Multiply the width in pixels by the height in pixels to get the exact number.)
–In Photoshop, you work only with those pixels.
–In Photoshop and on-screen, each pixel remains the same size, regardless of the image resolution.
–Image resolution determines the size of each pixel on the printed page.
–The size of the individual pixels determines the area on the printed page that the image will occupy. (Remember that the image consists of a set number of pixels.)
At 300 ppi (pixels per inch), each of the image’s pixels will print at 1/300th of an inch square. At 150 ppi, each printed pixel will be 1/150th of an inch. At 72 ppi, each pixel prints at 1/72nd of an inch. An image that’s 900 pixels wide and 1200 pixels high prints at a different size for each resolution.
It’s that simple: Image resolution determines the size of each pixel when printed, and the number of pixels in the image determines the actual size of the image on the printed page.
The View> Print Size command
Photoshop’s View> Print Size command purports to display an image on-screen at the actual print size. However, the command can’t do that for one specific reason: Photoshop doesn’t know your monitor size, nor the resolution to which it’s set.
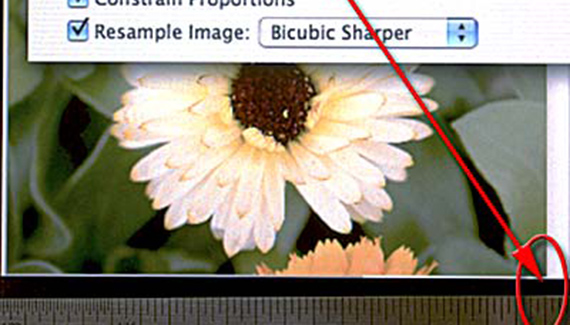
When the View> Print Size command is used, the image’s size on screen depends on the size of the monitor and the resolution to which it’s set. In this photo, you can see that the print size of the image in the Image Size dialog box doesn’t match the physical ruler held to the screen.
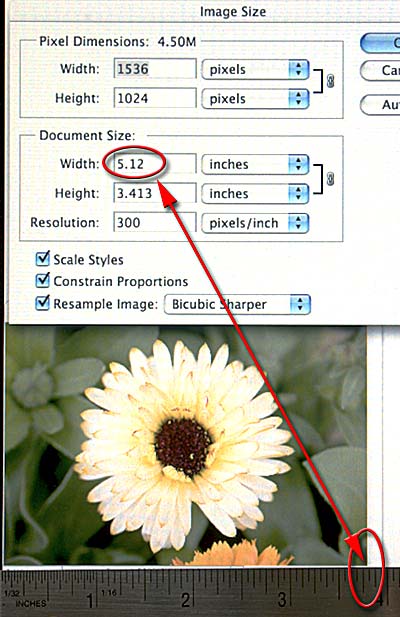
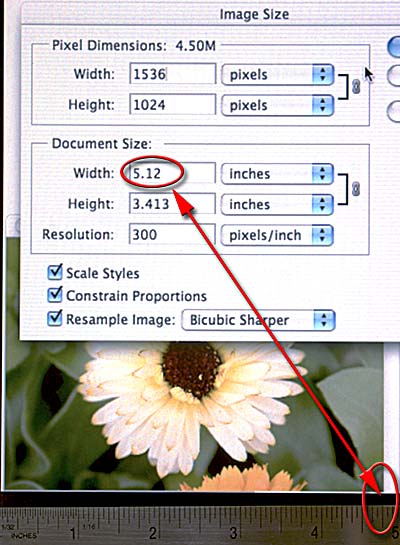
In the above example, the monitor is set to a resolution of 1280 pixels by 1024 pixels. Compare that to the photo below, using the same image, the same ruler, and the same monitor, but with the monitor set to a resolution of 1024 pixels by 768 pixels.
Here’s a simple test to see how much the Print Size view differs from the actual on-screen display of your monitor:
–Open any image in Photoshop.
–Use the menu command View> Print Size.
–Press Command-R (Mac) or Control-R (Windows) to show the Rulers.
–If the Rulers are not already set to Inches as the unit of measure, right-click (multi-button mouse) or Control-click (single button mouse) on one of the Rulers and select Inches from the contextual menu.
–Hold a standard ruler or tape measure near the screen (being careful not to scratch the screen) and compare the “real” ruler to Photoshop’s Ruler.
It’s easy to change the resolution of your monitor, should you so desire:
. Mac: Go to the blue Apple menu in the upper-left corner of the screen and select System Preferences. Double-click on Displays. Make the change in the Display tab.
.Windows: Go to the Start menu and select Control Panel. Double-click Display. Make the change in the Settings tab.

That was very helpful. In all that I know and have learned about photoshop, including the new master collection, I had never figured that out.
Thank you,
gina
I have an issue with printing pictures at local drug stores. I printed pictures from Walgreens that was cropped and edited already in Photoshop. My pictures came out with heads and feet cut off. I guess because its not set up for 4×6, 5×7, etc. 1 picture the document size is width=3.556 Height=3.408. I tried changing to 4×6 and the system won’t let me do it. If I put in 4 for witdh, the height comes out at 2.876 instead of 6. I am so confused!!! Do I have have to go to the professional printing shop to manually to put in the right image size or is there easier way for me to fix it?
i have an image at 72 dpi. i want to print the image on 200 dpi with a certain length and width. Meanwhile i want the print size and actual pixel size to be same. Please suggest :
Hi,
I’m sure that my question will have a simple explanation. Why do I at times have an acutal printed print size that is completely different from the size of the image in photoshop? This does not happen all the time, however, there are times when I have printed say 50 different images all with the same photoshop dimensions but some print out with a different size. This has caused some major head scratching. Hope you can help
If you want to view print size, go view>print size
Juan, change the DPI of your image to 200, see the dimensions. If bigger then you’re in the green. You can go to crop tool.
what I ususally do is take a ruler and change the view size by percentage until the ruler matches with the ruler from photoshop. or if i have my image media that I will print onto for example, paper, or label, i will hold it over my screen image and again change the % (located on the bottom left corner of photoshop or illustrator) until they are the same size.
Come on, can’t someone just make a program that will print an image to a given inch – regardless of anything else? I mean, an inch is an inch is an inch. Just print my pic at the inch dimensions I specify, no matter the pixels or resolution or quality. I want a 6″x6″ image printed. And inch is an inch. Just print whatever is in the queue to 6″ square. You mean Photoshop doesn’t know what an inch is? This whole thing is entirely ridiculous. I go to the print dialogue, tell the printer to print exactly 6″x6″ and it prints 8.462″x8.462″. That’s just insane. Can’t the people who program Photoshop simply make a dialogue that prints actual inches, regardless of resolution or pixels. And all these articles try and console us, trying to get us to follow some extremely complicated formula to make things work. How can 6″ not be 6″? Just print 6″ and damn the quality, resolution, pixels, etc. Just force everything into the inch proportions specified. How can that not be possible?
“It’s easy to change the resolution of your monitor…”
WHAT!? Why in the world would you tell people to change the monitor resolution? Leave that ALONE! What needs to happen here making sure Photoshop knows what p/i your monitor is.
If your View->Print Size onscreen ruler size is wrong you should change the Screen Resolution value in Preferences->Units & Rulers. Most monitors are around 100 pixels/inch.
To test, change the Screen Resolution value in PHOTOSHOP’s preferences and then hit View->Print Size again. Then remeasure the onscreen ruler with a real-world ruler. Just remember to select View->Print Size each time you adjust the Units & Rulers Screen Resolution setting.
Ah! Thanks @scooterbafa! I knew there had to be an option somewhere.
And dont believe the hype that PC monitors are 72dpi and 90-something. I believe modern monitors left those numbers a long time ago…
Yes, thanks @scooterbaga, that’s the simple set I was looking for.
If Isave an image as an 8×10, can I have it printed 8×10 and 8×12 or even 11×14 without lossing much of the image??
I had a situation where the image needed to be printed in different sizes. What is the best solution??
If I save an image as an 8×10, can I have it printed 8×10 and 8×12 or even 11×14 without lossing much of the image??
I had a situation where the image needed to be printed in different sizes. What is the best solution??
So… When I am resizing an image, I decide the image dimensions, and resolution. How is this even possible if resolution determines pixel size, and pixel size determines image size It does the math and then the pixels are determined? How does that not seem contradictory. its like this… A= reslolution, B=pixel size C= image size… so… A determines B, and B determines C. so how can I input A and C into that equation. You can’t. Something is a miss, and it seems no one really knows whats going on. Tell me how to build a computer then let me know the answers. “It’s that simple: Image resolution determines the size of each pixel when printed, and the number of pixels in the image determines the actual size of the image on the printed page. ” I decide size and resolution, what i may be missing is resolution doesn’t determine pixel number, only size. I just don’t get it, and no one has been able to explain things in a manner that at least I, and obviously many others, understand. im confused.
Although informative this doesn’t really help my problem.
I am a just-starting out graphic designer and a customer had me design images for a package for one of his products. The printed image must therefore be of exact dimensions (printed). I set the correct inches in Photoshop (using the “ruler”) and worked for many hours creating the image. But it won’t print at anything remotely close to what I need.
I understand some of the principles explained in the blog (above) yet they don’t address my particular problem which is how to get an exact, predefined print-size (result on paper) for my Photoshop image.
@scooterbaga Thank you!!! That’s exactly the info I needed. So simple rather than reset the resolution of the monitor???!!