
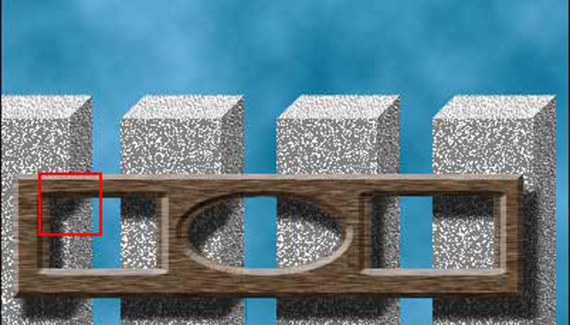
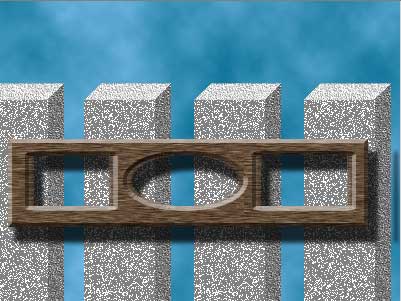
Sometimes a drop shadow needs to fall on only part of the layer or layers below. Perhaps the shadow should fall on the content of the layer immediately below, but not the layer below that. You’ll need to convert the drop shadow layer effect to a layer of its own, then edit that layer. In this example, the shadow of the foreground object should fall on the “pillars” but not on the “sky” behind. We’ll need to convert the drop shadow layer effect into an actual layer and then mask (or erase) the areas of the shadow that should not be visible.
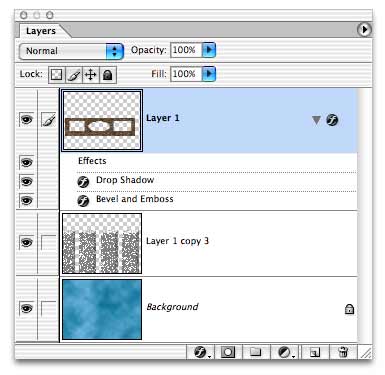
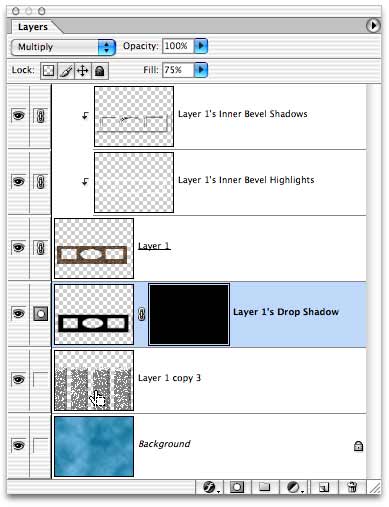
As you can see in the layers palette, this artwork consists of three layers: The top object, with both a Drop Shadow and a Bevel and Emboss applied as a layer style; a middle layer that contains the four “pillars;” and a Background layer with a “sky.”
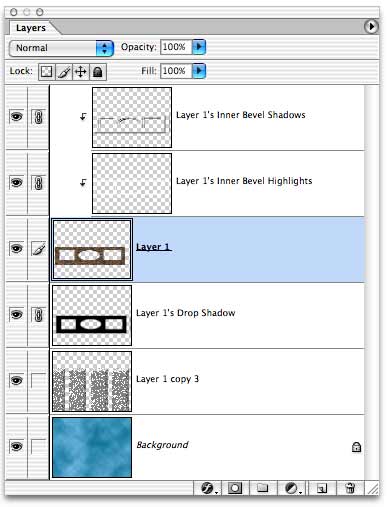
Using the menu command Image> Layer Style> Create Layers, we can convert the layer style elements in to actual pixel-bearing layers. (You’ll generally be notified that some aspects of layer styles cannot be retained through the conversion. If in fact the image’s appearance changes, you can use Edit> Undo to restore the layer style.)
In the Layers palette, note that the new layer “Layer 1’s Drop Shadow” was created below the original layer, while the shadows and highlights of the bevel were added above the original layer. Also observe that immediately after creating the layers, I linked them to the original Layer 1. This prevents accidental misalignment of the elements, which could lead to an unwanted (but rather interesting) mis-registration effect.
NOTE: For the purposes of this tutorial, I used the Create Layers command after applying a drop shadow and a bevel. In a normal workflow, I would apply the drop shadow, use the Create Layers command, then apply the bevel as a layer effect to the original Layer 1. This not only keeps the bevel as a “live” effect that can be updated, it simplifies the Layers palette and prevents any unwanted misalignment of elements.
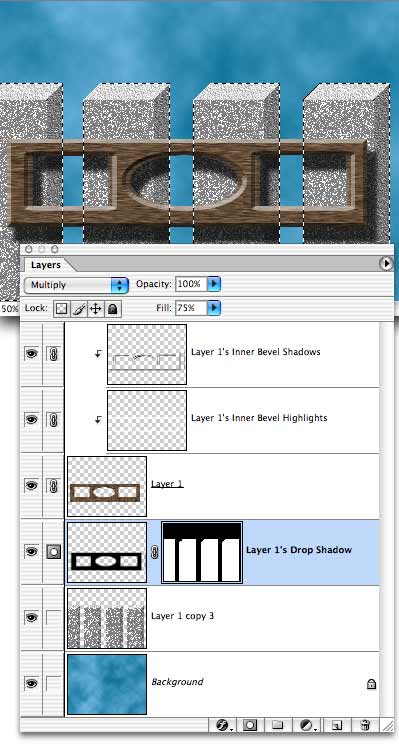
To edit the drop shadow, we’ll use a layer mask rather than simply erasing the unwanted areas of the drop shadow. In this case, the menu command Layer> Add Layer Mask> Hide All is appropriate, which adds a layer mask that’s completely filled with black.
Next, we’ll reveal the drop shadow only where we want it to fall. To do that, we can Command-click (Mac) or Control-click (Windows) on the Layers palette thumbnail for the layer below. That makes a selection of the layer’s content. Note, however, that the drop shadow’s layer mask is still the active layer in the Layers palette. (The layer mask thumbnail appears to the right of a layer’s thumbnail in the Layers palette. When it’s active, a double-box appears around the thumbnail.)
With the selection active, we can fill with white to reveal those areas on the drop shadow’s layer.
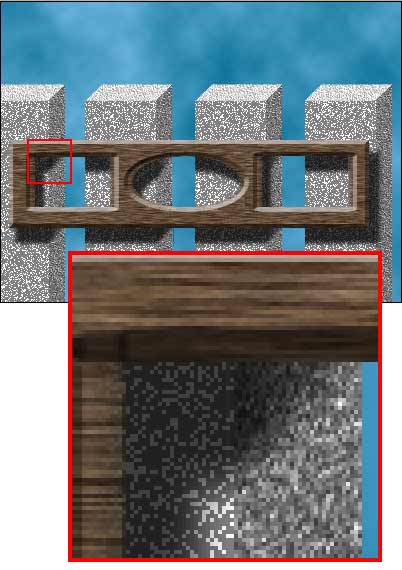
To finish the effect, I can individually select and transform the parts of the drop shadow that fall on the “sides” of the pillars. In this example, I’ve not only skewed the shadows upward along the sides, I’ve also used a very slight gradient in the layer mask to make the shadow fade a bit as it extends backward along the sides of the pillars.

I took a class in Photoshop about a year ago and they showed us how to separate a drop shadow from its object. Knowing that it was possible to do this in Photoshop, I have since tryed to remember the steps, without success. I really needed this effect this week and found just what I was looking for on your tutorial site!
Thank you so much for this tutorial! And thank you so much for this great website!
Loving PlanetPhotoshop.com,
Margaret
Great site, I’ve already found 4 tutorials that were very useful to me, and it’s only my first day of skimming through the tutorials! Keep it up!
Have been searching for hours for this. I knew at one time how to separate effects into their own layer, but didn’t recall the steps when I needed it. I appreciate your tutorial, it helps a lot further than just separating the effect into the layer. Thank you, I’ll be back!
Marianne
You are sooooooooooooooooooo wonderful!!!!!
It doesn’t work in CS5. I’ve been going nuts following different directions given to me and going over the details with a fine tooth comb. Nothing works. What a pain.
Ray – I just got CS5 and I was having the same problem. If you make the dropshadow under Effect / Stylize it doesn’t give you the old option of the check box with separate layers. However, if you make the shadow and then go to the Objects menu, you can select Expand and it separates them. sorry if you figured it out already – I was just looking for help on this today and I stumbled onto the answer.
Actually, in CS5 – if you make the drop shadow, keep the layer selected, go to Layer>Layer Style>Create Layer, it will work. Then you can edit the drop shadow layer. (Worked for me anyway, I was just trying to erase part of the shadow, nothing fancy.)
Its the ultimate tutorial i got . Thaks a lot