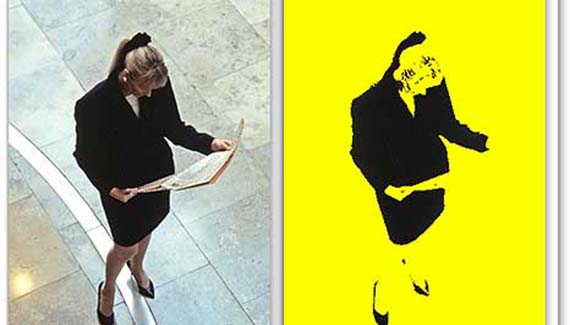
Using the Blend If sliders in the Layer Style dialog box, you can quickly and easily create interesting duotone and silhouette effects. Image #1930014 from PhotoSpin.com is an excellent candidate for this technique, featuring prominent dark areas that tell the story of the image.

Step 1
Add a new layer and fill with a light and bright color of your choice.
Step 2
With the upper layer active in the Layers palette, open the Blending Options pane of the Layer style dialog box.

Step 3
Drag the lower-left Blend If slider control toward the right to control how much of the lower layer shows through.
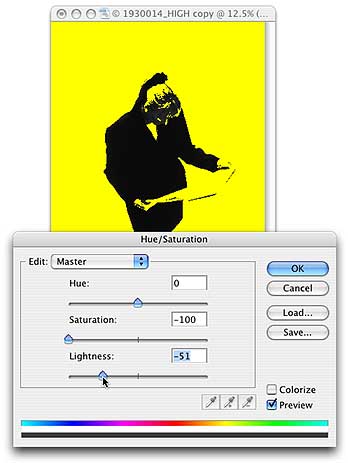
Step 4 (Optional)
For greater control over the appearance of the image, and to ensure that your image retains a duotone appearance, add a Hue/Saturation adjustment layer between your two layer (so that it is applied only to the lower layer), drag the Saturation slider all the way to the left, and adjust the Lightness slider to suit your taste.

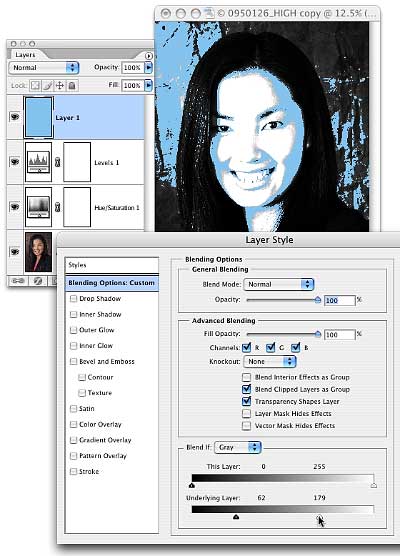
For an interesting variation (using PhotoSpin.com’s image #0950126), desaturate the lower layer with a Hue/Saturation adjustment layer, and add a Levels adjustment layer and drag the upper-right slider control to 128.

Now when you add a new color layer, you can adjust both the lower-left and the lower-right slider controls in the Blend If area of the Layer Style dialog box.

No comments yet.
RSS feed for comments on this post. TrackBack URI
Corey shows you how to recreate this rugged, weathered look using a couple of filters, blending modes, and layer masks.
Use a clipping group to place an image inside of a background of text, with another layer of text placed in front to create depth.
In this tutorial Corey shows you how to take an existing image and turn it into it’s own custom brush.
In this tutorial Corey creates a realistic-looking coin effect using the channels palette and the lighting effects filter.
If you’re trying to set type that looks typographically correct in Photoshop, there’s an old habit you’ll have to break, and that’s the curse of putting two spaces at the end of every sentence. This is a holdover from people who at one time used traditional typewriters, where adding two spaces was necessary, but in typesetting that’s a huge no-no. About 70% of the text I copy-and-paste from text files that people give me has two spaces, but I use this Photoshop tip to fix the problem in just seconds. First, go under the Edit menu and choose Find and Replace Text. In the Find field, press the Spacebar twice (entering two spaces), then in Change To, press the Spacebar just once. Click Change All, and every time Photoshop finds two spaces at the end of a sentence, it will replace it with just one, making you typographically correct.