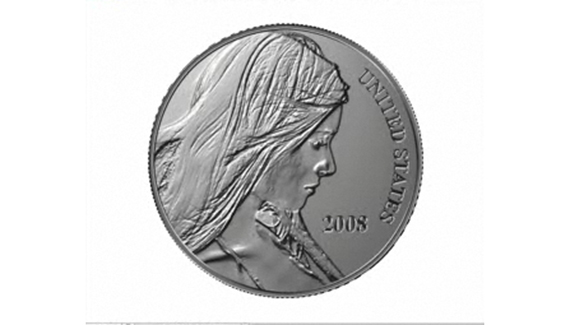
In this tutorial Corey creates a realistic-looking coin effect using the channels palette and the lighting effects filter.

In this tutorial Corey creates a realistic-looking coin effect using the channels palette and the lighting effects filter.

Nice one corey thanks for this came in real use 😛
Hi there I just wanted to compliment you on the newest video addition you uploaded, you did a great job at creating this and commend you for the technique. I have seen this done before but a poor recreation at best. i truly enjoy your videos and i am glad that i bumped into your site by accident.
its nice and cool
How about a dollar bill now? Its too hard to counterfeit coins 🙂
This effect could be used in making etchings into photgraphed trees or mountains, you think? I’d really like to see what mount Rushmore looks like with my face instead 🙂
Thanks for all your free lessons you’ve defiantly inspired me and many others i’m sure. I’ve become huge a planetphotoshop fan.
Is there a short cut to toggle between tools in the too pallet?
let say i type “L” for lasso tool, but i want the Magnetic lasso tool is there a way to scroll down?
Thanks Ray
wow corey, this tutorial is great! can we make it also in PSE?
you are a PS wizard (miss you on pse user tuts)
Yes! Thank you, I’ve been trying to do this properly for weeks. Didn’t think about using alpha channels. Thanks, this helped a lot.
nice web I like the tutorial
This was yet another great tutorial. I was somewhat dissatisfied with the “copper coin” at the conclusion, so I tweaked the colors to get a darker, more used-looking coin. Still didn’t quite look right, so I added another layer, selected the coin to create a mask. I went into filters->render->clouds and filled the selection with clouds. I then went into blending options, and set fill opacity to 75%, and set the mode to color dodge. Suddenly I had a shiny new penny!
I used an image of Charlize Theron as the source model, and I’ve put a copy of the finished product on my home page in case anyone wants to see my results.
Are there any written directions for this coin tutorial? You went way too fast for me but I love the idea and want to try.
it’s good idea
inspiring work !
fast tutorial though…..pretty cool
Keep it up… Good one!
Márcio Guerra
Good tutorial ^_^, thanx Corey
How can you do this in paint shop pro ? I like this coin and would like to do this any clues?
THANK YOU VERY MUCH THIS WAS VERY HELPFUL TO ME
thanksssssss man its soo soo sooooooooooo cooooooooooooooLL
its so good tutorial simple and effective
This is so great. Needed it for a metal sculpture image project. Thanks
thanks! this was a very useful tutorial.
its nice and cool
thanks a lot~ it’s really cool^^..
Thanks so much for this lesson! The coinage is beautiful!
Hi Corey, another fantastic tutorial. Here is my coin collection you helped me create.
http://www.flickr.com/photos/dereksbeard/3328703809/
this is a very nice tutorial, but i was looking for something a little bit diferent…. do you have any tutorial where u teach how to do a coin but that golden coins like the old civilizations and like we see in the pirates movies? i really need to know how to do that for a work i have in progress… can yoou help me? thanks…
Very nice tutorial!!!
This is the best site in the world!
Ramon Duzzioni
Brazil
this worked amazingly well, i’m really happy with the result. i went on to use my coin to create an image reminiscent of the opening of the first pirates of the carribean-a coin being dropped into a large pile. i noticed that when i rotated the coin 180 degrees, it looked like the embossing had reversed. is there a quick way to change the lighting?
To Display Fill dialog box, why my shortcut is Shift + F5, but yours is Shift + Del?
Hey…..You did a bang-up job on this presentation, truely OUTSTANDING! You have given me a lot of great ideas on the desiging of my coin.
THANKS!!!
respect!!! a very good tutor!!! Pro…