
Camera RAW Color Spaces
“Why do my RAW images look so much worse in Photoshop than they do in the Camera RAW preview window?” Has that been happening to you? If so, let me whisper softly those two words that strike fear into the hearts of even the bravest: “color management.” If your images look less saturated, less vibrant after they’re brought into Photoshop from Camera RAW, your color spaces probably don’t match. Don’t worry, it’s an easy fix.
In the lower-left corner of Photoshop CS’s Camera RAW dialog box is a little pop-up menu named Space. In that pop-up menu you have several color space options. The default (and a fine choice) is Adobe RGB.
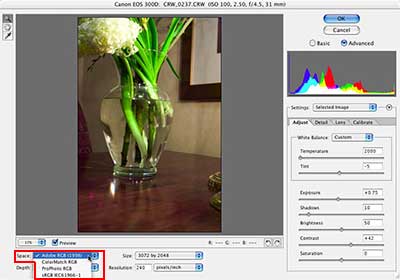
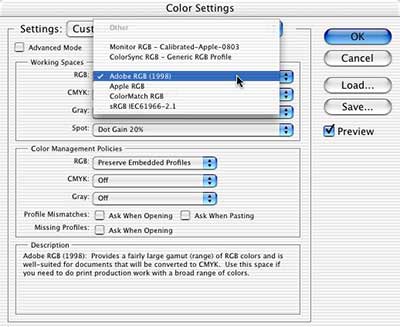
If your Photoshop Color Settings dialog box has a different color profile selected as the RGB Working Space, you’re getting a color shift between the Camera RAW plug-in and Photoshop itself.
Regardless of what color profile you use in Color Settings, you can restore your image’s vibrancy with the Image> Mode> Assign Profile command. Compare the following three images:
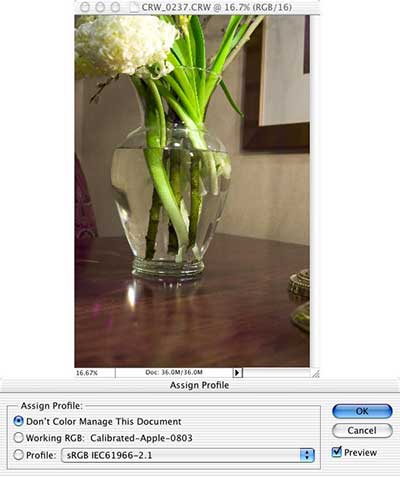
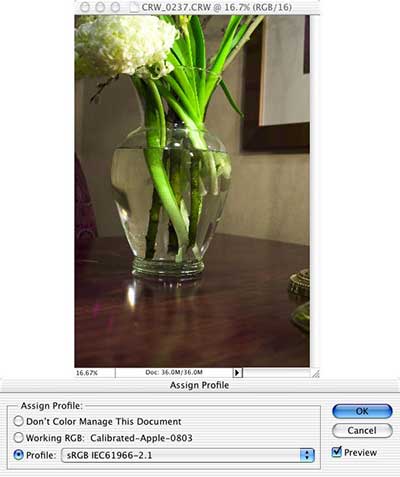

As you can see, assigning the same color space that was used in Camera RAW produces the image that matches the adjustments done to the original RAW file.

Hello,
Thanks for sharing.
In photoshop, I am using a profile created with X-Rite tool. In camera RAW, I can NOT find the same profile created. What shall I do ?
Thanks
It helped me a lot, thanks!
Lájk
Oh my goodness. Thank you. I have spent hours trying to figure this out. I was surprised when my raw photo showed up in Photo Shop with an imbedded profile of sRGB. You are the only person that addressed this raw issue in this clear cut simple manner. Settings in the camera develop platform.
Again thanks.