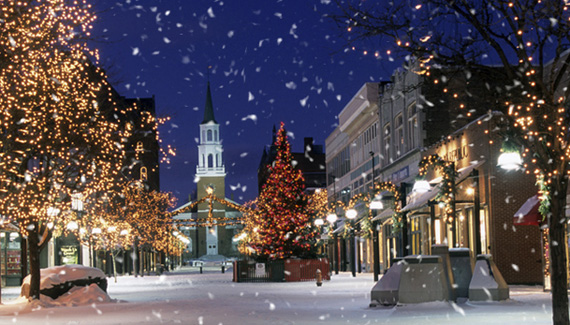
Celebrate the holiday season by learning how to use Photoshop to create falling snow over your favorite holiday image.

Celebrate the holiday season by learning how to use Photoshop to create falling snow over your favorite holiday image.

Nice, lovely trick ! Loving the tuts ! Greetz +
Great tutorial – am having a problem, am using Photoshop CS3 Extended. When i get to the animation part, measurement log is grayed out (I can’t fiddle with the settings)
any advice with be appreciated!
Great tutorial!
Hi Corey. This is amazing.
Thank you for yet another great photoshop-animaition tip.
I will order your dvd on animaiting in photoshop soon 😉
Merry christmas.
– Mads from Denmark
Great tutorial Corey! After your animated rain tutorial i used a similar technique to create a floating mist effect, and wanted to achieve something similar to this, now i finally can.
Perfect technique for the holidays! CS4 Extended is cool.
These effects work great even without the animation. Thanks.
Très beau tutoriel! Very nice tutorial. Very simply to do and gives a very nice result.
Once again Bravo! From Laval, Québec.
As usual, yours is the best tutorial for falling snow. Thanks so much for giving clear, step-by-step directions that produce great results.
WOW! Your tutorials are always cool but I think you outdid your self… this is amazing. Just great. Thanks Corey and Happy Holidays!
Thats Awesome But How Do I Save What Format?
Hi! Thanks for awesome tut, but Im having one problem. When needed to go to distort>displace I cant pick it, because it is grey. What’s the problem?
Brody, I had the same question. Perhaps you figured it out already.
Looks like File > Export > Render Video.
Yeah! My first animation, hehe.
Excellent tutorial, Corey. You are the BEST.
Hey Corey,
Great video. I have 2 questions… can I download the video to watch when I don’ t have access to the internet ? It would be nice to send the photo with falling snow as an email greeting card. How do I save it and how big is the typical file ? How do I email it I guess is what I am asking. Thanks again for all the great stuff you bring to us ! happy Holidays… Andrea
Thank you Corey. Can someone show me how to export this out to .fla or flash file?
Yea, I really need to know how to save this animation to .swf (flash) file too.
I went to save for web and devices and saved it as a gif file. Worked fine. Not sure how to save as flash.
Frickin’ brilliant! I had figured everything out on my own except for the displacement map.
I’ve done this tut and added another layer with small snow behind with displacement also to get that feeling of depth and it looks great in CS3, it is 800 pix wide and 72dpi but when I save for the web, and want it to loop, it runs out of memory. It’s only 4 seconds long and I have a 2gig processor and 4 gigs of ram. I can’t figure out how to get it to save as looped. it will either run just 4 seconds, or not allow me to save.. basically all it has to do is start over.. but with the timeline, I don’t see where to get it to do that .. What am I doing wrong? I don’t have fireworks so basically need help
Corey ur site is the most amazing Photoshop site I have ever seen. Not only your knowledge but your insight in design and creativity – Excellent.
I have only been working with Photoshop Elements 5 and have been able to animate snow, but only a blinking type of snow. I viewed your tutorial and wow, great. Will I be able to do this with Photoshop CS3?
Thank you.
hi Corey
always amazing your tutorials. i would like to use same picture you used is there any site you downloaded it. i’m waiting to try it out. i even added an animation to curtains tutorial the spotlight moving came pretty good.
thanks in advance and keep us dreaming
Jason
I wish I could make those animations on my pics but it doesn’t appear that version 7.0 has those capabilities.
Thats amazing! Good stuff!
Hello.. thanks for the tutorial its really good..i did it but i’m having problems when i try to save it.. its not working.. can someone help me? thank you..
The Displacement map is a really great addition to the snow, however it slows down the animation ALOT and increases the file size when i try to save for web and devices by alot also, my document is only 350×150 px at 72 dpi and it’s still at a hefty 3mb, doesn’t sound like much, but i doubt anybody wants to wait around for about 5 minutes while my picture loads, it may also annoy people who don’t want me wasting their bandwidth.
Is there a way i can optimise the animation without loosing too much detail?
Is it possible to save animations as an animated GIF, so you can mobilize it out of photoshop?
I created a great looking snow falling effect for my image but Im having trouble saving the file. Not sure if I am doing this correctly.
I am saving this as a gif dithered format. The snow is falling very slow when I preview it in Windows but works perfect in MAC. I need the snow to move faster.
The image size is 1022 x 226 pixels at a 350 DPI. Not sure how this should be saved so it previews correctly on the web.
Can anyone help me please?
Thanks in advance.
I wanted to know how to get the flash style animated “window”.
Mine looks like image ready, and I dont see an option to change it to the “flash” style.
Thanks for you help.
hi
wonderful tutorial
i really hang on it
Brilliant!
Absolutely Ace 5*
Man , i don;t understand on a step , you say Shift Elite what the f*** ?Shift eLite ?Explain dude Explain !
Shift-Delete
I don’t get it with the animation 🙁
Can somebody help me?
Great Tutorial! Keep up the great work. 😀
thanks for the tutorial Corey , but how you’re animation bar is like this, mine is simple.pls help me
I have been looking for awhile now on some better info on how to cut and maintan my lawn and now I found it.
Exelente! BellÃsimo! Lo que estaba buscando incansablemente desde hace mucho tiempo. Mil gracias. No sé inglés, pero provista de un diccionario (inglés/español), pude seguir los pasos con absoluta seguridad. Soy novata en esto, pero me encanta, El Motivo que se guarda, se puede usar para otros trabajos?
great i made the snow but im now having a problem, how do i save the picture so that i have a picture that the snow is moving, i tried saving as a GIF but it didnt work all i have is a picture with snow but not moving, i wanted to use the picture on my pages and videos. can anyone help with how to save it as a moving picture thanks,
it was awesome………………….
Holy crap slow down man! It was helpful but I had to do things three times before I got it right, having to pause and fall behind my class. For future reference, go a little slower.
I got it all working great, but when I save it as a GIF it makes the quality drop a lot! Makes it look a little pixilated and I was just wondering if there was a way around that? The banner I made is pretty big, 900×350 or so. I’m using CS3 and im sure its in the settings but..help!
Thanks, its hard to find a good tutorial on falling snow for cs4 and I use mac.
Hi, I have a hearing impairment.
Is it possible to get written instructions to this tutorial?
I would be delighted to have the psd file.
Hi, I have Photoshop CS5 and only recently when I am trying to save my animation as a ‘.gif’ the Photoshop CS5 programme becomes unresponsive and automatically closes the programme losing whatever I have done. Obviously I have learned to save the file as a .psd before trying to save it as a gif but still the problem persists..Can you tell me what to do??