very cool. i only have photoshop 7.0 though so there isn’t an animation window. just curious if anyone can help me out as to whether i need to pay for an upgrade or whatever.
thanks,
blake
These tutorials are wonderful… if only I could see them better?
Eyes being as they are, mine have gotten worse over the years, so it would be great to be able to download videos to view on a 3rd party on Zoom Player where they can be wound backward to play over those parts that went too fast and enlarged for the visually impaired. Hope Cory will see this and take it into consideration for those of us who love watching but can’t quite make out some of what is going on in the video (such as tools, settings, or menus used).
Love all the guys I’ve seen on PhotoshopTV, Matt, Cory, RC, Scott, & Dave with their many high end professional friends in the field. What they are doing to help everyone is nothing short of fantastic.
The Fill Dialogue is behind Edit > Fill, or you can press Shift + F5
As for animation in PS7, this specific animation technique can only be done with CS3. You should definitely make the upgrade, regardless of what you do with Photoshop. It is *well* worth the money!
What is the best way to save the file so the animation works good when you post it on the web? The way I saved it the animation only works once in a while.
nice tutorial , i did find the video a little small but its nicely narrated , when i save it as a gif though it looses its animation, anyone know what im doing wrong?
Dear Corey,
thanks for the great tutorials, especailly the ones like animating rain. Unfortunately since my CS3 is not the extended version I got mixed up when I came to make the aniamtion and failed miserably. Can you enlighten me please?
BTW…wrong info about saving. If you want to save as a .gif select “save for web & devices…”. In there it will not lose the animation plus you can do other custom options.
It works fine until the end.
How do you put it onto a website..?
I make signatures for people on games and forums, stuff like that but the rain doesn’t seem to be moving on them..?
My friend said: File, Save for web, .GIF
It doesn’t work… http://i332.photobucket.com/albums/m351/TheKingAlan/AMsigcopy.jpg
(not the .GIF file)
I need the rain on that to be moving but it says on photobucket “Upload failed for AM-sig4.gif with error: Source file is over the file size limit of”
Wow very nice picture! I wish I could make such a picture..
But I’m from Sweden and I have photoshop in swedish so I can’t find all things that you’re using. :/
Hi again 🙂 I’ve been spending long time to make a picture like this but I’m stuck at the animation line. which command do you press to make it like you did? please help me
This is great, i just have 1 problem, you see im alright up to the animation part. I have photoshop cs4 on pc and i dont know how to get the timeline thing up anyone help me?
n by the way people who don’t know where the fill dialogue is neither did i bit i found it in the edit menu.
good tutorial but somethings wrong…i do everything fine but when im close to the end my hard disc space goes smaller and smaller and i cant save because of not enough space.what am i doing wrong?please answer me
Check your file size first. You may be building the animation on a larger than necessary file. Check you hard disk space. Photoshop uses
your hard disk for scratch space and virtual memory. This can have an effect as well.
Hi !
I absolutely love this tutorial, but when I need to rotate the rain and turn it to a smart object, the animation won’t repeat, right ?
Is there a possibility to change it that it would somehow ?
Please, help.
Thanks.
corey barker- i want to know how to do a similar thing as well.. but with glitter.. would it be the same way? i am familiar with image ready and used to things with glitter fills but not sure how i would do them with cs3 seeing as there is no image ready. thanks if u can see my email id appreciate it if you’d email me there thanks!
everything goes as smoothly as it’s suposed to be up until when im suposed to hold SHIFT+ClicknDrag the rain to make it move, when i drag it, it all becomes messed up with some parts faster then others and all rectangular when i play it.. dunnoe whats messed up, havent tried on my other computer tho.
hey wat is this?! i am in 7th grade and this is so _______ confusing! i cant do this can u do somthing not so _______ confusing and stop talk so fast! ty
from
-lexii
YOU CAN ANIMATE LIKE THAT ON PHOTOSHOP?!?! I NEVER KNEW THAT!……. wait I have a different photoshop thingy D: darn oh well….
NICE TOTORIAL THOUGH :D:D:D:D
i was doing great following it beautifuly but then i got stuck at the part where you turn the rain picture around i managed to turn it around but couldnt go any further as i dont know how to click it back off so it doest keep turning or let me do anything else is there a key i have to press to deactivate the moving the frame around.
i was doing great following it beautifuly but then i got stuck at the part where you turn the rain picture around i managed to turn it around but couldnt go any further as i dont know how to click it back off so it doest keep turning or let me do anything else is there a key i have to press to deactivate the moving the frame around.
in the snow animation i do everything correct, i save the file i then click the file on and great it works moving snow, but then it stops working after few seconds???? corey could you please help with my above question to thanks.
Great and very useful tutorial.Thank you so much!You’re awesome!
(Helen if you mean the part that you turn around the picture manually,first press CTRL and T and afterwards hold SHIFT while you’re turning it,so as to maintain the exact image.Then just click the tick box on your up right side to apply the result.)
Thanks for taking the time to show us that, it was a lot of fun. When I got to the part about running the rain in an endless loop, I definatly missed something there. Well that and my rain sure came out much thicker. I’ve learned to just take it frame by frame moving the animation with a 0.2 delay & making sure it has like 6 frames to repeat. Not perfect by any means, but for personal forum signatures it works ok for now while I learn it all 🙂 btw using CS5, not sure if that made a difference or not ^^


AMAZINGGGG! hehehe =]
cool x 10. and great new look.
Awesome but at the start I have a PC and how do i bring up the fill dialogue?
Thanks
yeah it’d really be nice of you if u could tell us again how to make the fill dialogue show up 🙂
nice work
thnx
Another one I will play with. Thanks Cory.
Wow, Coooooooooooooooooool. Oh, thank you teacher. Wow, I did it.
The keystroke on a PC is Shift-Backspace
very cool. i only have photoshop 7.0 though so there isn’t an animation window. just curious if anyone can help me out as to whether i need to pay for an upgrade or whatever.
thanks,
blake
These tutorials are wonderful… if only I could see them better?
Eyes being as they are, mine have gotten worse over the years, so it would be great to be able to download videos to view on a 3rd party on Zoom Player where they can be wound backward to play over those parts that went too fast and enlarged for the visually impaired. Hope Cory will see this and take it into consideration for those of us who love watching but can’t quite make out some of what is going on in the video (such as tools, settings, or menus used).
Love all the guys I’ve seen on PhotoshopTV, Matt, Cory, RC, Scott, & Dave with their many high end professional friends in the field. What they are doing to help everyone is nothing short of fantastic.
Ditto the remarks of Lynn Cartwright. Is there any way to receive a step by step written tutorial?
The Fill Dialogue is behind Edit > Fill, or you can press Shift + F5
As for animation in PS7, this specific animation technique can only be done with CS3. You should definitely make the upgrade, regardless of what you do with Photoshop. It is *well* worth the money!
Hi all!
This is awesome! I can’t even find the correct words to describe it! Fantastic!
Thanks for the tutorial!
It was like if were sitting near you. You have answered nearly all of my questions jut when I thought about them. 😀
By the way sorry for my English!
Bye!
cool, can you draw something on that too?
What is the best way to save the file so the animation works good when you post it on the web? The way I saved it the animation only works once in a while.
loop it forever or change the options to play as many times as you like. Great tutorial, there’s so many fun things you can do!
Can you show how to make a potrait stencil using cs3. Tq.
Great Tutorial 🙂
keep the good work
tnx
Do you have to have the premium version of CS3? I have the standard version of CS3 and the animation window isn’t like the one in the tutorial.
Yes, these animation features are only available in Photoshop Extended.
nice tutorial , i did find the video a little small but its nicely narrated , when i save it as a gif though it looses its animation, anyone know what im doing wrong?
Nice one, again, Corey!
A gif probably will loose the animation, try it in a .swf or .mov file…
Good Luck and thanks.
Márcio Guerra
Great tutorial – very helpful and a good alternative to other rain options.
I find that when I save the image the speed it plays at is much slower than in Photoshop – how can we adjust the timing?
Thank you!
Dear Corey,
thanks for the great tutorials, especailly the ones like animating rain. Unfortunately since my CS3 is not the extended version I got mixed up when I came to make the aniamtion and failed miserably. Can you enlighten me please?
Joseph
WOW!
You are amazing, your tutorial style is so easy to follow.
Thanks mate!
Hey how could you modify this so you can add the rain to an already transparent image? Otherwise you can see the dark boundary box of the layer style.
This was a very well done tutorial. I took it several steps extra and added lightening effects and more realistic rain…check it out on my myspace!
BTW…wrong info about saving. If you want to save as a .gif select “save for web & devices…”. In there it will not lose the animation plus you can do other custom options.
It works fine until the end.
How do you put it onto a website..?
I make signatures for people on games and forums, stuff like that but the rain doesn’t seem to be moving on them..?
My friend said: File, Save for web, .GIF
It doesn’t work…
http://i332.photobucket.com/albums/m351/TheKingAlan/AMsigcopy.jpg
(not the .GIF file)
I need the rain on that to be moving but it says on photobucket “Upload failed for AM-sig4.gif with error: Source file is over the file size limit of”
That doesn’t work for me..
as i go into “save for web & devices…” and it’s on .GIF and stuff but as i put it on forums and things it’s not animated…
Its good have this website. Thanks to you Mr. Corey you are not selfish to share your talent. Keep up a good work.
Wow very nice picture! I wish I could make such a picture..
But I’m from Sweden and I have photoshop in swedish so I can’t find all things that you’re using. :/
Hi again 🙂 I’ve been spending long time to make a picture like this but I’m stuck at the animation line. which command do you press to make it like you did? please help me
Great, is it posible to place this little animation into a web page?
Sorry for posting so much.. but how do you save it so it will be a moving picture?
I tried save it as a .gif file but it’s not animated :/
fantastic tutorial, i have followed a few tutorials on rain effects, but not animated rain, the end result was awsome, thank alot!!!!
This is great, i just have 1 problem, you see im alright up to the animation part. I have photoshop cs4 on pc and i dont know how to get the timeline thing up anyone help me?
n by the way people who don’t know where the fill dialogue is neither did i bit i found it in the edit menu.
Hey Mr. Corey..
you r R0ck..
Thanks
Hey I just wanted to ask if this could be possible to work on Photoshop CS2.
The animation is totally different and of course.. I got lost and confused
Thanks
Great Video 🙂
it’s AMAZINGGGG
but how can i save it on .gif
please help me
good tutorial but somethings wrong…i do everything fine but when im close to the end my hard disc space goes smaller and smaller and i cant save because of not enough space.what am i doing wrong?please answer me
Check your file size first. You may be building the animation on a larger than necessary file. Check you hard disk space. Photoshop uses
your hard disk for scratch space and virtual memory. This can have an effect as well.
Hi !
I absolutely love this tutorial, but when I need to rotate the rain and turn it to a smart object, the animation won’t repeat, right ?
Is there a possibility to change it that it would somehow ?
Please, help.
Thanks.
corey barker- i want to know how to do a similar thing as well.. but with glitter.. would it be the same way? i am familiar with image ready and used to things with glitter fills but not sure how i would do them with cs3 seeing as there is no image ready. thanks if u can see my email id appreciate it if you’d email me there thanks!
Amazing, you make everything so easy & absoloutely clear.
wooooow amazing!
everything goes as smoothly as it’s suposed to be up until when im suposed to hold SHIFT+ClicknDrag the rain to make it move, when i drag it, it all becomes messed up with some parts faster then others and all rectangular when i play it.. dunnoe whats messed up, havent tried on my other computer tho.
how i make the rain slow?
going to try the rain tut this weekend best tut ever for rain thanks
make the rain fall over pic was looking good went “save as a gif” and lost animation how do I save as a gif and not lose the animation help!!
Amazing Tutorial! Thank you so very much! I’ve been looking for a tut like this, but this one puts out!
how can i do it in adobe photoshop 7, here no option in window for animation??????
Probably the best rain tutorial available, short and precise. fantastic !!
OMGSH YOU ARE SOOOOO GOOD AT ANIMATION
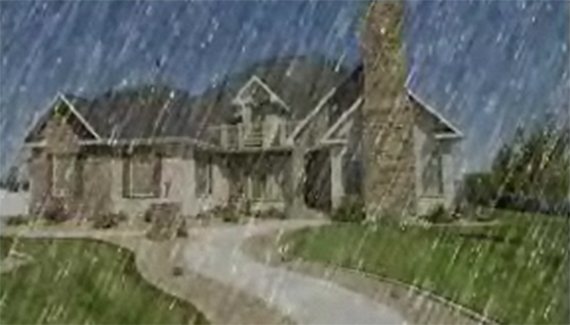
great job and nice house heheheheheh
-aishat
I had to do this for a school Assignment 🙁 But it was pretty cool!
hey wat is this?! i am in 7th grade and this is so _______ confusing! i cant do this can u do somthing not so _______ confusing and stop talk so fast! ty
from
-lexii
YOU CAN ANIMATE LIKE THAT ON PHOTOSHOP?!?! I NEVER KNEW THAT!……. wait I have a different photoshop thingy D: darn oh well….
NICE TOTORIAL THOUGH :D:D:D:D
hi i’m working on an animation on final cut express
i was wondering if i could apply this to a few photos, then import them into final cut
You talk to fast…can’t keep up!!!
i was doing great following it beautifuly but then i got stuck at the part where you turn the rain picture around i managed to turn it around but couldnt go any further as i dont know how to click it back off so it doest keep turning or let me do anything else is there a key i have to press to deactivate the moving the frame around.
i was doing great following it beautifuly but then i got stuck at the part where you turn the rain picture around i managed to turn it around but couldnt go any further as i dont know how to click it back off so it doest keep turning or let me do anything else is there a key i have to press to deactivate the moving the frame around.
in the snow animation i do everything correct, i save the file i then click the file on and great it works moving snow, but then it stops working after few seconds???? corey could you please help with my above question to thanks.
Great and very useful tutorial.Thank you so much!You’re awesome!
(Helen if you mean the part that you turn around the picture manually,first press CTRL and T and afterwards hold SHIFT while you’re turning it,so as to maintain the exact image.Then just click the tick box on your up right side to apply the result.)
How do you drag the layer down after making the keyframe?
It won’t let me do that.
Thank you! You solved my problem even though I used different version of adobe.
http://img16.imageshack.us/i/gilchlorosig.gif/
Thanks for taking the time to show us that, it was a lot of fun. When I got to the part about running the rain in an endless loop, I definatly missed something there. Well that and my rain sure came out much thicker. I’ve learned to just take it frame by frame moving the animation with a 0.2 delay & making sure it has like 6 frames to repeat. Not perfect by any means, but for personal forum signatures it works ok for now while I learn it all 🙂 btw using CS5, not sure if that made a difference or not ^^
First, it’s a good tutorial. I already at the end of it, and when I saved it as a .gif, it won’t animated. Can you help me? Thanks a lot
Don’t save as gif. Render it out as a video clip. Go to File>Export>Render Video.
I also love your voice.. it’s clear and you talk nicely.. easy to follow..
And i’m dutch 😀
How about adding lighting effect too to this tutorial ?
how do i save it where it will stay animated. I need help. (it needs to be put into a vid im making)
Shouldn’t they put that all into a filter? 😛
Thank you very much!
hey, this rain has no cloud?!