
Make your text look like it’s been around the block… or two! Call it weathered, grungy, or distressed, or what have you, the secret to creating this quick and easy effect is the same: All you need is a layer mask and one of the nifty artistic brushes already built into our beloved Photoshop.
Set some type
Step 1: Create a new document in Photoshop by pressing Command + N (PC: Ctrl + N). Press T to select the Type tool.
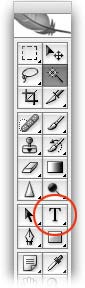
Step 2: Choose a nice thick, big, and bold font from the options toolbar at the top of your screen, then type the word “weathered” in all caps. I chose Impact at 92 points, and picked a charcoal gray from the color well (circled in red below).

Create a mask
Instead of damaging the text itself, we’ll create the weathered effect on a layer mask.
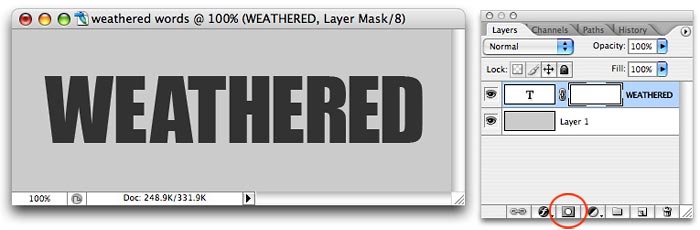
Step 3: With the type layer selected, create a layer mask by clicking the circle within a square icon at the bottom of the Layers Palette.
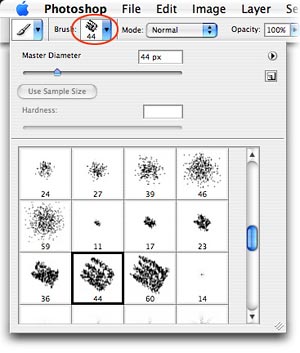
Step 4: Press B to select the Brush tool. Hop up to the options toolbar atop your screen and click the little menu to the right of the word Brush. Scroll down until you begin to see the oddly distorted, artistic brushes like Spatter and Chalk. Click on a brush to select it; I picked Chalk at 44 pt.
Paint on a weathered look
In the realm of layer masks, painting with black hides and painting with white reveals. To create our weathered look, we want to hide bits of the text with the odd-shaped brush we chose in Step 4.
Step 5: With black as the topmost (foreground) color chip in the Toolbar, begin to click around on the word “weathered”, using a combination of dragging or just clicking to get a worn look. I’ve circled my brush in red below.
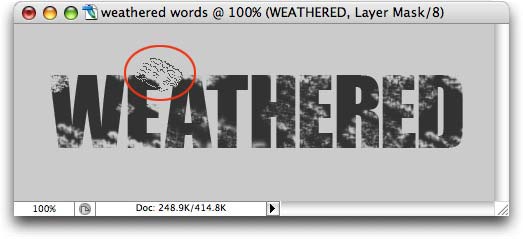
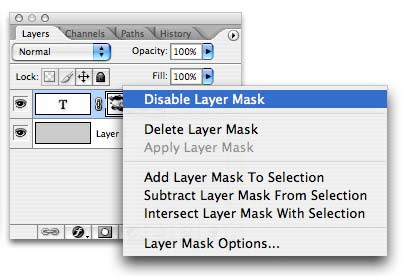
If you accidentally hide too much of an area, just press X to swap color chips (so that white is on top) and paint that area back in. Press X again to switch to black, and continue clicking to weather the type. If you totally blow it and want to start over, just Control click (PC: Right click) on the layer mask thumbnail and select Delete Layer Mask.
The key to making this effect look good is to swap between using large and small brushes in order to get the edges of the letters themselves so they aren’t perfectly straight. TIP: Press the left bracket, [, to cycle down in brush size, and the right bracket, ], to cycle up.
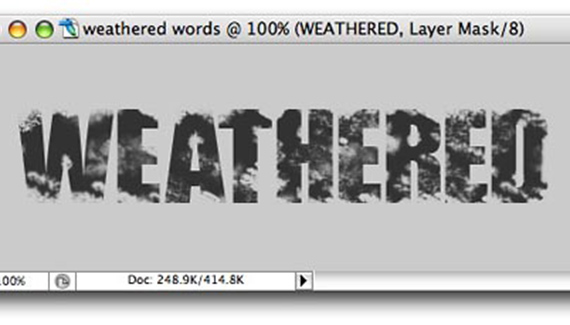
Here’s what I ended up with (the layer mask is circled in red):
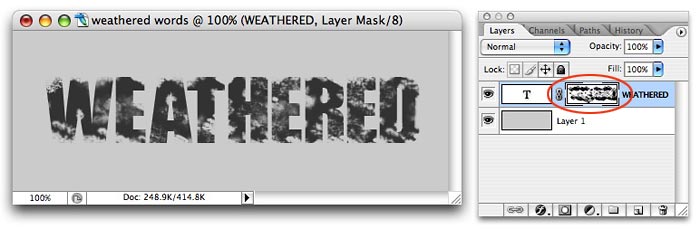
Using a variety of brushes, you can get really creative with this effect. And by using a layer mask, we’ve harmed nary a pixel of the type.
Until next time, remember to experiment with different brushes and be sure to visit the Adobe Studio Exchange to download more artistic brushes… for free!
The graphic reporter – http://www.graphicreporter.com
