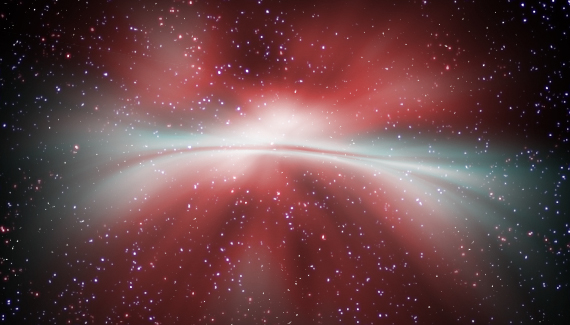
Corey replicates the Planet Photoshop background by demonstrating how to create the star field and the nebulous clouds.

Corey replicates the Planet Photoshop background by demonstrating how to create the star field and the nebulous clouds.

WOW! Excellent Tutorial!
How do you remember all of this?
Well done!
GREAT!!
David
🙂
Awesome tut, Corey!
I may be the only Pser that really appreciates your background tuts. These are invaluable for designing various web pages and of course, image back drops.
Great stuff.
That is a really cool effect!
As always Cory. You rock and so do your tutorials!
Great tutorial!
I never knew how to make stars
Corey you totally rock! That was such a great tutorial. You always provide the creative sanity in my engineer dominated world.
good tutorial 😉
Cool
Fantastic Tutorial!! Corey you hit it out of the park again.
it’s great but for me as a freshman need long time to learn it step by step… thanks
another excellent tutorial, cory – thanks a lot.
Totally kool tutorial!! Your tuts are the best.
Cool Tut! But when I am doing the stars after the levels adjustment, I have no twinkling stars.
Is this good or bad??
My end result isn’t like Corey’s either.
Your tuts are the best.
jes , the best photoshop site!
But can you make a tutorial for signatures for forum pleas???
YOU ARE AMAZING, i AM GONNA TRY THIS OUT. i HAVE BEEN WAITING FOR SO LONG TO CHANGE MY mYSPACE BACKGROUND. tHaNKS
check out my new myspace background at: myspace.com/cutiteo. Thanks for you tutorial, Corey. By the wayz, How do you resize the image bigger? I Don’t want the image to be repeated on the backgroound. Thanks in advance
good tutorial 😉
thanks
WOW!!! Love it. Super effect and pretty easy too. Thanks a lot.
what a great design is this .but this vedio gives the easy way of done this design
Yes, indeed great tutorials, but can I have the transcript for them? I mean instructions step by step. I would like to try to create the effects myself.
Thanks.
Hey i really enjoyed this tut, but i got stuck on the Luminosity part. Im using Vista (photoshop cs3) and for my Luminosity it doesn’t sparkle/twinkle like yours. Ive never used this Luminosity before so its kind of new to me.
Could any possibly help me?
I’m sorry for the trouble..
Good tutorial. However in you said press shift+delete to go to fill options after you made the first empty layer but its actually Shift+Backspace.
Again and again…
Nice tutorial! From scratch, hein? Good one!
Márcio Guerra
Okay dude! YOU ARE AWESOME!! i finally got it to work =D excellent tutorial dude, ill be sure to use these effect for school assignments to give me that extra mark =D thank you and hope this continues =D
Thanks man, you thought a noob something new 🙂 Check my “Website” if you wanna see the result.
Wow awesome work and tutorial i’ve been ignoring my photoshop suite (CS1) for years up till a few months ago this will definitely help with compositions and backgrounds which i use Apophysis and Bryce 6.1 for that and skies.
Thanks
(WARNING STRESSED OUT PERSON) ok i think im a retard cause im doing the select the stars thingy so they start shinin then i make another layer expand them by one pixel they start shinin even more (this is the part where i really scru up) so i have my colors on default and everything u said i press ctrl+backspace (i have a comp) more stars in background the shiny stars just get bigger and i’ve tried this once i got it but im trying again and im failing miserably. i cat get the stars to stop shinin
If anyone has any ideas pleas e contanct me my email is : emil_aka_lime@hotmail.com
Stars make my world – go – round lol. Awesome tutorial Corey, can’t wait to put it to good use =0)
The luminosity shortcut doesnt work on..?? :S option+command+~ does not work in my photoshop.. anybody know why?
Where can I download the tutorials for future reference so I won’t have to be on the Internet just to view a tutorial?
heyi saw this and its sweet buty delema is i cant get the outr-glw on the stars to work bcuase im on pc i tryed clicking on the rgb one which i what i thought you said was the right on but it didnt work for me
idk what im doing wrogcan you help
sry i missed that you have to hldcntrl when you click rgb
Just awsome. Simple, easy to remember and to do. Thnaks!
Well, with this tutorial and the tutorial of the new planet one, i did this last night.
http://konum.deviantart.com/art/Sunrise-at-space-89631965
Hope you like it 🙂
awesome tutorial, thanks
dude that was freakin sweet!!!!!!!!!!!!!!! bin wonderin how 2 do stuff like that 4 ages!
gona get 2 it rite away!! :D:D:D
CHEERS!!!
wow I did it!! amazing tuts on your site here corey!! thanks!!!
wow… I have really learned a lot from your tutorials, I’m kind of a beginner, but once i started learning how to do so many cool things from your tutorials, I kind of became addicted. Now I see why my little sister spends so much time playing around with photoshop 😀
where is the warp tool?i dont have it in the menu???i have the photoshop7 and CS8 and nothing…or im stupid…p.s. i have a pc not mac>>>please help me…thanx >>great work-uROCK!!!
That’s cool Corey!!! Every time I play your tutorials my dog starts barking. She must think there’s a strange man in the house. 🙂
That was awesome along with the lightspeed one. How do you come up with this stuff!
Thanks for sharing this wonderful tutorials
How do you get the stars to “twinkle”???? Any help would be great. Thanks
Very generous of you Corey. I found this to be very useful.
man why when I go to select to click modify it won’t work…It doesn’t let me click it cuz its not highlighted. HELP PLZ!!!!!
Corey you are great! Thx a lot. Wonderfull nebula (better then the real one)
That’s a much better way to make space FX, thanks heaps Corey 🙂
The issue I have is when I hit shift delete, I do not get a fill menu screen that pops up… nothing pops up! Do I have to change something in the preferences or something??
Hi. Nice tutorial. However, I am stuck at the luminosity part. Can u please help me out, cos my stars dont twinkle? Ty.
Woow, really amazing.
I have just one problem.
When I want to add those Nebula Clouds, I make a new layer to which I render clouds (without a mask). However, when I go to that layer and Filter–>Render–>Clouds it just makes that layer black. Just… Black… Please help :O
thankyou,您真的好棒ï¼
Hey dude know it has been a long time since you made the vid but then i try to warp and then i’m done i’m getting some white zones where the warp has been any idea why?
think i got it 😀
Great video Dude love it 😀
Thanks!
cool tutorials… thanks
OMG this is such a great tutorial. You are like a wizard of creating designs online. You are my hero(: <3
Dude this is really cool and trippy.
Awesome…that’s all I can say 🙂
COOOOOOOOOOOOOOOOOOOOOOLLLLLL
This is a nice site. Good fresh, informative articles and beautiful interface. I’ll be back soon, to thank the great article.
I am very impressed, so it has been found that you haveso well with so much class, subject and more. A top-notch, buddy! Really great thingshere.
This is a fantastic tutorial! Great job and very informative! Making space scenes will never be the same! 🙂
Wow!!!! just amazing, you are a great teacher, regards from Guatemala
Those parts of the system that you can hit with a hammer (not advised) are called hardware; those program instructions that you can only curse at are called software. Thanks for you sharing..