
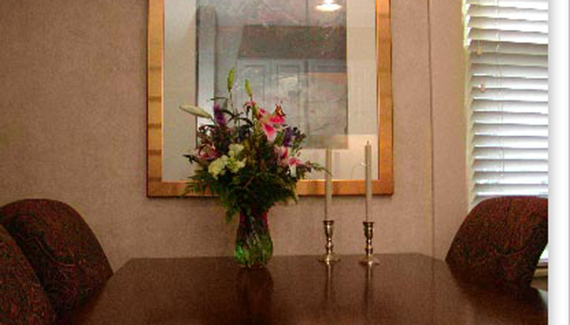
Although it’s not the purpose for which it was designed, the new Color Replacement tool in Photoshop CS is an incredibly efficient way to remove digital noise from photos. Paint away noise quickly and easily! Noise, those red, blue, and green specks in a digital photo, can destroy an image. Most common when taking images in low-light situations, noise can appear in virtually any image.
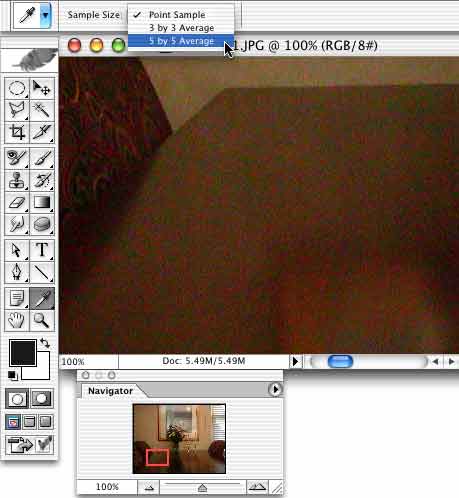
You’ll want to use this technique in areas of reasonably-similar color (although luminosity differences are not a problem). Start with the Eyedropper tool. In the Options Bar, set the tool to sample a five-pixel by five-pixel area. Click in the area that you’ll be fixing to select that color as the foreground color.
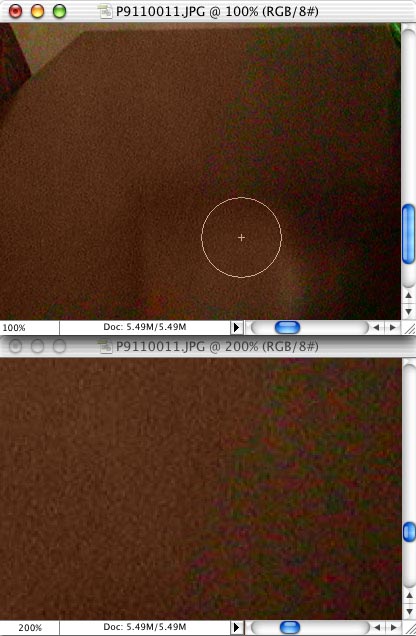
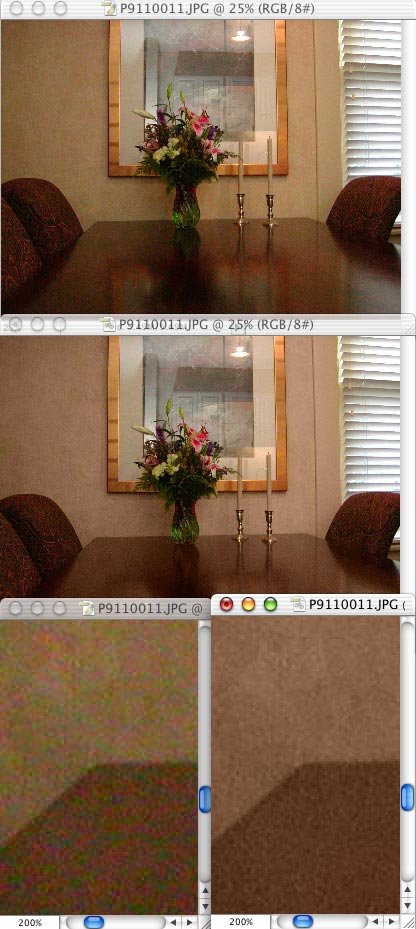
Now select the Color Replacement tool. In the Options Bar, you’ll want Sampling set to Continuous, Limits set to Find Edges, and a Tolerance of about 30%. Paint away the noise! Notice how the reflection in the table’s surface is preserved, even as the noise is removed.
In this image, we can also use the Color Replacement tool to eliminate noise in the patterned wallpaper. Since the pattern is created with two similar colors (with substantially different lightness values), it is preserved. If the wallpaper used two very different colors, such as yellow and red, the Color Replacement tool would not be effective.
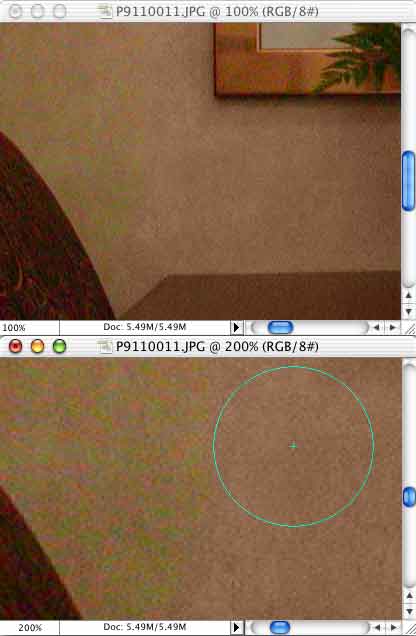
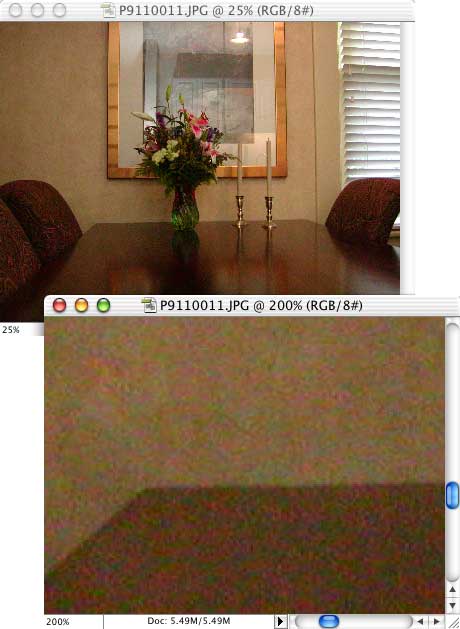
Compare the “before” image (top and bottom left) and the “after” image (middle and bottom-right).
Now, about that grain problem…

This technique works but as you stated it has it limitations concerning many colors. What is the method to remove noise using Channels?
Thank you