
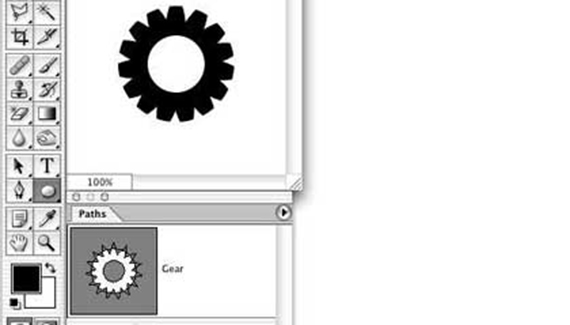
Photoshop’s Pen and Shape tools are incredibly powerful tools, especially when creating complex compound paths by intersecting paths. To see how this works, let’s create a gear in Photoshop.
Select the Custom Shape tool in the Toolbox. In the Options Bar, click the middle of the three buttons to the left so that the tool will create work paths (rather than shape layers). Now click on the triangle to the right of the Shape: sample to open the Custom Shape Picker. From the Picker’s menu, choose Shapes and elect to append those shapes to the existing palette content.
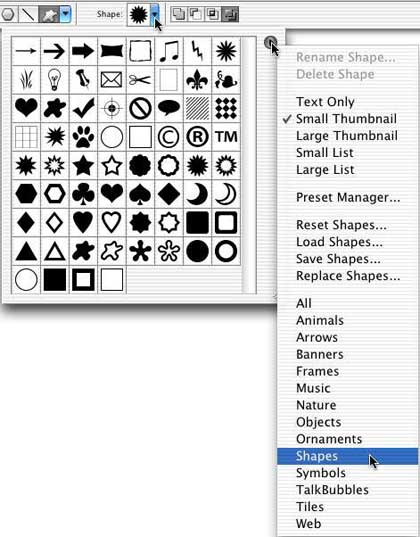
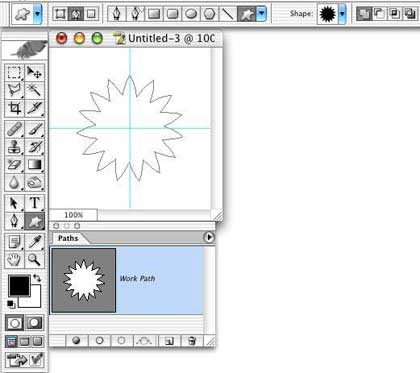
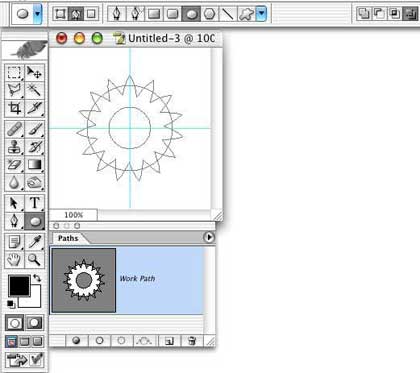
We’ll use the shape named Flower 2. (The shape Flower 2 Frame and the inside already cut out, but we’ll do that ourselves to see how to exclude one part of a path using another path.) I’ve added a couple of guides so I know exactly where to start as I drag paths.
I held down the Options and Shift keys (Alt-Shift for Windows) and dragged from the intersection of the guides. The Shift key constrains the path to the original aspect ratio (round in this case), and Option/Alt enables you do create outward from the point clicked.
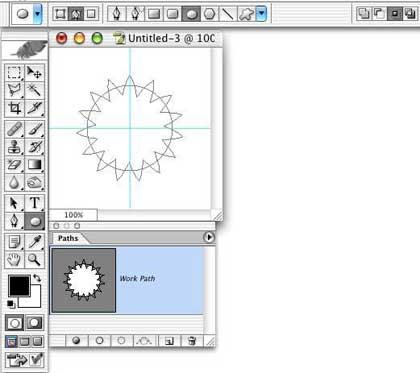
Now switch to the Elliptical Shape tool in the Toolbox. In the Options Bar, toward the right, click on the third of the four buttons. When the tool is dragged, only that part of the shape that falls within both paths (the intersection of the paths) will be considered to be “inside” the path when we later fill the shape. We’ll use this shape to cut off the pointy tips of the original shape. Again, drag from the intersection of the guides so that the paths are centered on each other. As soon as you start to drag, press the Shift and Option/Alt and hold them down until after you release the mouse button. After you release the mouse button, take a look in the Paths palette at the shape’s thumbnail. The white area indicates what part of the compound path is considered “inside” the path.
Now we’ll cut a hole from the middle of the shape. Retain the Elliptical shape tool, but in the Options Bar, click on the fourth of the behavior buttons. This will cut out or “exclude” any area of intersection between a new path and the existing path. Once again, drag from the center to make the hole in the center of the gear. Do not press the Shift-Option/Alt keys until after you have started to drag. Check the thumbnail in the Paths palette to see the new shape.
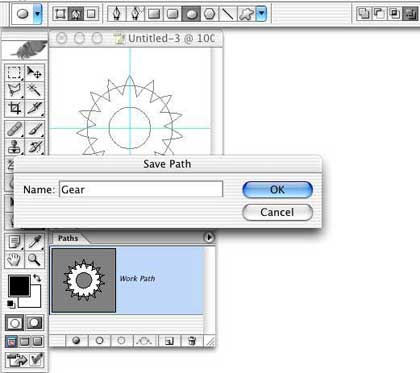
Remember that a path isn’t saved until it’s renamed. In the Paths palette, double-click “Work Path” and name your path. You can also at this point create a custom shape with the menu command Edit> Define Custom Shape. If you’ll be creating a series of gears (or whatever compound shape you create) definitely define a new custom shape. (And keep in mind that your custom shape isn’t truly saved until you use Edit> Preset Manager to save it in a set of shapes.)
You can now fill your custom path/shape by clicking the leftmost button at the bottom of the Paths palette.
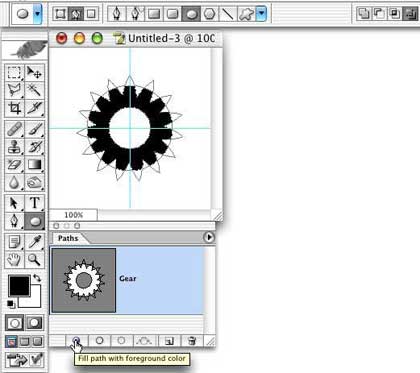
Click in the empty area of the Paths palette below your path to deselect and hide the path.
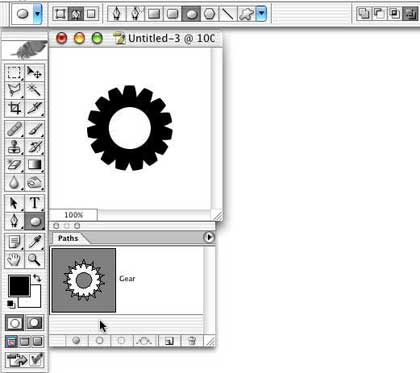
This is just one example of how you can create complex shapes by intersection and excluding paths.

hi,
I am a new student at Central Georgia Technical College ,we use Photoshop in our Digital Imaging Class .Creating-a-gear was one of our assignments , following the instructions was a little difficult . On step 2 , Now switch to the Elliptical Shape tooland taking notice of the path window .I was using the wrong tool ,I don’t know if the names are the same or not but I’m new at this (Elliptical and Ellipse) and I know you did’nt say Marquee but I figured it out it was the Ellipse Shape Tool not the E lliptical Marquee Tool .I downloaded the 30 day trial and was able to try different things until I got mine to look like yours.
Thanks , Vanessa Harris
clasic 😛
nice… Thinks… I am working on a project.. and this helped a lot… More power! nice gear…
I see it’s your passion. 🙂
this tutorial is very difficult to understand, with out any real guidance to telling people where the tools ou are explaining are located, or what items on the option bar you are referring to. The truly hard part is that no matter what I have done, I have not been able to have the path be filled when I hit the fill path button under the paths window. If I try to use paint bucket or some such tool, it just fills the whole page black as the path is just defined as a bunch of lines that are not actually existing, there are no layers, only the background.
CS4 macbook pro
Thanks for this tutorial. It’s exactly what I was looking for and I was able to follow along with no problems!