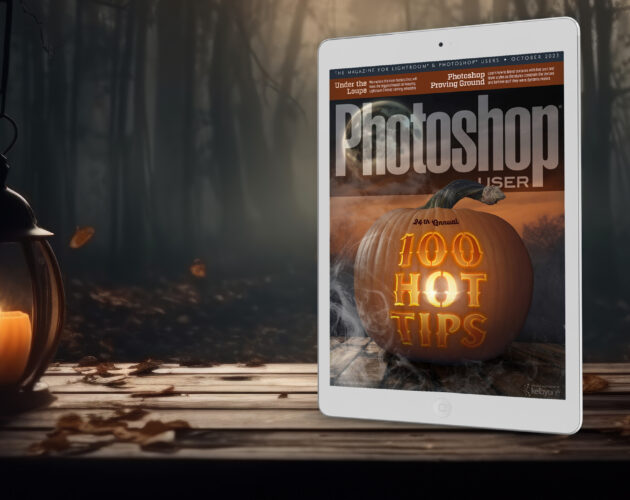
Photoshop’s spell checker isn’t just window dressing; it has a very robust spell-checking function, akin to Adobe InDesign’s own spell checker, but if you understand how it works, you can save yourself some time and frustration. Basically, if you highlight some text on a layer, it checks just the highlighted text, so if you highlight one word, it just checks that one word (even if there are dozens of words in your paragraph). If you choose to spell check but don’t have anything highlighted, it checks your entire document, regardless of how many Type layers you have. It’s also helpful to know that it only checks real Type layers (layers that have a capital “T” as their thumbnail image in the Layers palette), and it cannot spell-check any layers with text that have been rasterized (converted from a Type layer into a regular image layer).
This tip relates to a previous tip, where you created what’s called a “text box” so that your type wraps within a text block, rather than running in one straight line. The tip is this: If you’ve created some standard type by just clicking and typing rather than creating a paragraph text block, you’re not out of luck. While the Type layer is active, just go under the Layer menu, under Type, and choose Convert to Paragraph Text. Now your type will wrap within the text box boundaries, and you can edit the boundaries by adjusting the corner and center points.
Although the Character palette has numeric controls for making your type fatter (horizontal scaling) or taller (vertical scaling), it’s usually easier to do these two functions visually (rather than numerically). Here’s how: First set your type, then with the Type cursor still blinking somewhere in the text, press-and-hold the Command key (PC: Control key) to bring up the Free Transform bounding box. To make your type fatter, click on the center handle on either side, release the Command/Control key and drag outward. To make your type taller, grab the center handle on the top or bottom, release the Command/Control key, and drag upward or downward.
How do you merge two Type layers together? Unfortunately, while they’re still editable Type layers, you can’t—you have to rasterize the layers first. Technically, you rasterize just one (the bottom of the two Type layers), and then make the top Type layer active and press Command-E (PC: Control-E) to merge these two layers together. However, when you do that, the top Type layer will automatically rasterize as the two layers are combined into one, so there’s really no way around it—with the exception of this little tip: Highlight the editable type on the top layer and choose Cut from the Edit menu. Switch to the lower Type layer, click your Type cursor once at the end of the type, press Return (PC: Enter) to start a new line, then choose Paste from the Edit menu to paste the contents of the top Type layer into the bottom Type layer. Then drag the old top Type layer into the Trash icon at the bottom of the Layers palette. Although it takes a little effort, now you have both layers combined into one layer (your goal), but the type remains totally editable (the bonus).
As you probably know, you can jump to most any tool in the Toolbox by pressing a single-key keyboard shortcut. (If you didn’t know that, sell your copy of Photoshop. Kidding. Just turn to Chapter 2 for some essential tips.) Here’s the problem: While creating type with the Type tool (T), if you press one of those one-key shortcuts (let’s say the letter P for the Pen tool), instead of jumping to the Pen tool, Photoshop types the letter “p”. It’ll drive you nuts. Okay, you won’t go nuts, but at the very least you’ll have a lot of typos. The reason is this: You have to tell Photoshop that you’re done editing your type. You do this in one of three ways: (1) Click on the checkmark icon at the far right of the Options Bar, (2) press the Enter key, or (3) switch to another tool manually by clicking on it in the Toolbox. Any of these three tells Photoshop that you’re done and lets you use the single-key shortcuts to switch tools.
You can visually control the spacing between your type (which is much better than numerically trying to figure it out) by using the same keyboard shortcuts for adjusting type that Adobe Illustrator uses. Here’s how: To set the tracking tighter (tightening the space between each letter or word in a group), highlight the type with the Type tool (T), then press Option-Left Arrow (PC: Alt-Left Arrow) to tighten. Press Option-Right Arrow (PC: Alt-Right Arrow) to add more space between a selected group of letters or words. To adjust the space between two individual letters (called kerning), click your cursor between the two letters and use the same keyboard shortcuts mentioned above.
If you have multiple Type layers and you want to convert them all to image layers, there’s a way to do it without individually rasterizing each. Simply go under the Layer menu, under Rasterize, and choose All Layers. This will rasterize all the Type layers at once.
Here’s a cool little tip for changing your font size without having the Type tool active. Just click on your Type layer (in the Layers palette), then go under the Window menu and choose Character. When the Character palette appears, you can make changes to your type size, color, font, tracking, etc. It freaks you out, doesn’t it?
Here’s a tip that can save you a lot of tool switching when formatting your type. Once you create your type with the Type tool (T), and while your cursor is still blinking somewhere in the text, if you need to move the type, you don’t have to switch to the Move tool—just move your Type cursor away from your type (either above, below, or an inch or so to the right or left), and your cursor will temporarily change to the Move tool. You can now simply click-and-drag your type. If you want to edit your type some more, just move your cursor back to the type and click where you need to make edits.
In Photoshop, you can change the color of your type without even selecting it first. “Why is that important?” you may ask. If you highlight your type to change its color using the Foreground color swatch in the Toolbox, the highlighting hides the color of your type so you can’t see any of your color changes while you’re in the Color Picker. So instead, after you commit your type by pressing the Enter key, click on the Color swatch in the Options Bar (without highlighting your type first) when you have the Type tool (T) active. As you change colors in the resulting Color Picker, you’ll see your type update on the fly.
We’ve already talked about rasterizing text, but once you’ve rasterized your Type layer into a regular image layer, your type is no longer editable (meaning you can’t go back and change typefaces, type in a different word, adjust leading or kerning, etc.). Here’s a quick way around that limitation. Before rasterizing (rendering) your type, duplicate the Type layer by dragging it to the Create a New Layer icon at the bottom of the Layers palette. Then, hide the original Type layer from view (by clicking on the Eye icon next to the original Type layer) and rasterize the duplicate Type layer (see previous tip). That way, if you ever need to go back and change the word (or font, leading, etc.), you have the original editable Type layer still available. Just simply make it visible by clicking in the empty box where the Eye icon used to be.
Earlier, I gave you the quick tip for rasterizing your type by Control-clicking (PC: Right-clicking) on your Type layer in the Layers palette, then choosing Rasterize Type from the contextual menu that appears. Believe it or not, there’s an even faster way, if you don’t mind spending a minute or two up front setting it up, by creating an action that rasterizes the type for you with just one key. Here’s how: Use the Type tool (T) to create a Type layer, then make the Actions palette visible (from the Window menu). Choose New Action from the Actions palette’s flyout menu. Name your new action “Rasterize Type Layers,” assign it an action set from the Set pop-up menu, then from the Function Key pop-up menu, assign an F-key to this action. Click the Record button, then go under the Layer menu, under Rasterize, and choose Type. Now go back to the Actions palette and click on the Stop icon at the bottom of the palette (it’s the first icon from the left). That’s it—your action is written. Test it by creating a Type layer, then pressing the F-key you assigned to your action. It should instantly rasterize (you’ll know if it worked, because the “T” icon on the Type layer will no longer be visible).
Here’s a tip to quickly change typefaces and see the change while you make it. First, highlight the type you want to change, and then press Command-H (PC: Control-H) to hide the highlighting (the type is still highlighted; the highlight is just hidden from view). Then, up in the Options Bar, click once in the Font field, then use the Up/Down Arrow keys on your keyboard to scroll through your installed typefaces. Man, do I love this one.
First, set your Foreground color to black by pressing D. Press T to choose the Type tool and create your text (you don’t have to rasterize the type). Then, open the image you want to appear inside your type and use the Move tool (V) to drag-and-drop it into your type document (it should appear on the layer above your Type layer. If it doesn’t, just go to the Layers palette and move it on top of your Type layer). To put your image inside the type, press Command-Option-G (PC: Control-Alt-G) to create a clipping mask and whammo—your image is masked into your type. You can reposition the image by using the Move tool. And since you didn’t rasterize your Type layer, your text remains totally editable—just click on the Type layer and start editing. You can add layer styles to your Type layer to further enhance the effect. If you’re not crazy about the image you picked, click on the image layer and press the keyboard shortcut again to release the mask. Now remove the image.
If you want to convert your Type layer into paths (as if you meticulously drew the type with the Pen tool—your clients won’t have to know), simply go under the Layer menu, under Type, and choose Create Work Path.
Pages: 1 2 3 4 5 6 7 8 9 10 11 12 13 14 15 16 17 18 19 20 21 22 23 24
Use a clipping group to place an image inside of a background of text, with another layer of text placed in front to create depth.
In this tutorial Corey shows you how to take an existing image and turn it into it’s own custom brush.
In this tutorial Corey creates a realistic-looking coin effect using the channels palette and the lighting effects filter.
Create really cool borders in under a minute to use on virtually any one of your photos or even video for that matter.
Photoshop’s spell checker isn’t just window dressing; it has a very robust spell-checking function, akin to Adobe InDesign’s own spell checker, but if you understand how it works, you can save yourself some time and frustration. Basically, if you highlight some text on a layer, it checks just the highlighted text, so if you highlight one word, it just checks that one word (even if there are dozens of words in your paragraph). If you choose to spell check but don’t have anything highlighted, it checks your entire document, regardless of how many Type layers you have. It’s also helpful to know that it only checks real Type layers (layers that have a capital “T” as their thumbnail image in the Layers palette), and it cannot spell-check any layers with text that have been rasterized (converted from a Type layer into a regular image layer).