
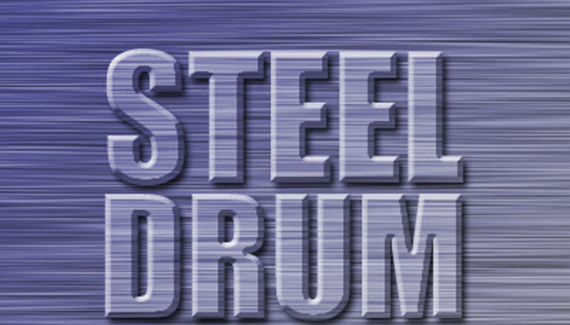
Brushed metal is always a cool effect to pull off in Photoshop. And after you’ve created your steel texture, what better place to use it than to produce beveled steel type?

Step 1
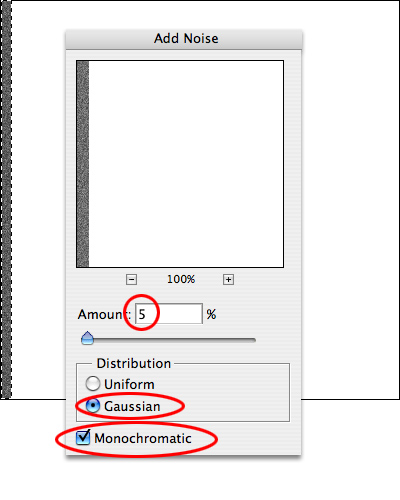
Start with a 400 pixel by 400 pixel document. Select a small strip near one edge with the Rectangular Marquee tool, and fill it with 50% gray (Edit > Fill > 50% gray). Add noise (Filter > Noise > Add Noise…), setting the Amount for 5%, Gaussian distribution and check the Monochromatic box.
Step 2
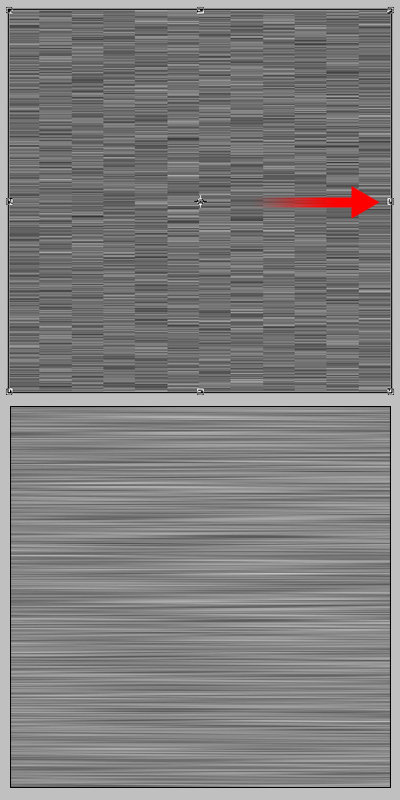
With the noisy stuff selected, s-t-r-e-t-c-h the noise sideways to fill the square (Edit > Free Transform, then pull the sides out to the edge of the document.) Hit Return (Enter) to apply the transformation. Voila- brushed steel! Name the layer Steel.
Step 3
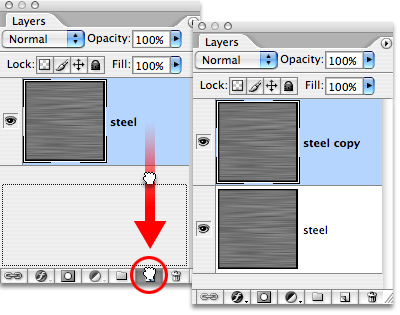
Duplicate the Steel layer by dragging it to the New Layer icon at the bottom of the Layers palette.
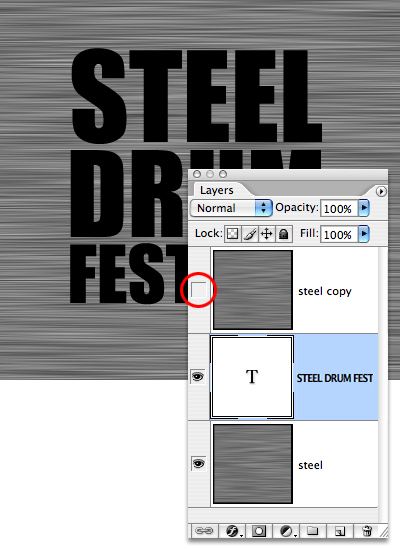
Step 4
Hide the top Steel layer by tapping on the eyeball icon. Select the bottom layer, and then type in the name you want in brushed steel. (By selecting the bottom layer, the Type layer will fit between the two Steel layers.) Use a bold font- Impact in all caps seems to look good for this example of a logo for the Steel Drum Festival.
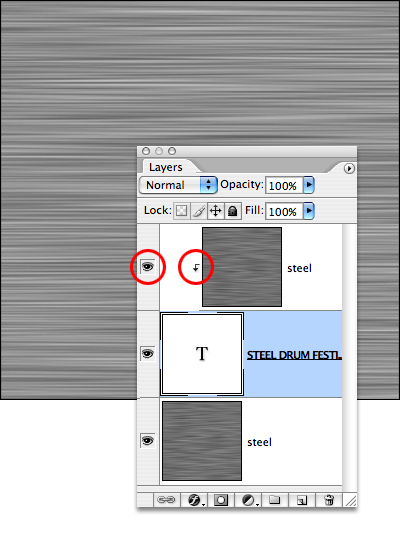
Step 5
Turn on the top Steel layer’s eyeball, and then create a clipping group (Command-Option-G [Control-Alt-G]). You’ll see the top Steel layer move to the right on the Layers palette and a small arrow will appear. A clipping group limits the visibility of the top grouped layer to the layer it’s grouped with. You won’t see any change… yet. .
Step 6
At the bottom of the Layers palette is the Add a Layer Style icon- it looks like an f in a gray circle. Click and hold on it, and pull down to Bevel and Emboss. Choose Inner Bevel, Chisel Hard, and set a pretty serious Depth of 250%. Set your Highlight to 100% and your Shadow to 40%. You’ll see the beveled type appear as if by Photoshop magic.

Step 7
For those of you who want to go a little farther, add a Hue/Saturation adjustment layer for a little color and a slight drop shadow to finish the effect.
